

Introduction
Almost everyone has experienced the disappointment of capturing a special moment, only to realize later that the picture is out of focus. That’s why learning how to edit blurry photos is such a valuable skill. Whether you snapped a once-in-a-lifetime family shot, a travel memory, or a product photo for your online shop, blurriness can make an otherwise great picture unusable. Fortunately, today’s editing tools and techniques give you a real chance to recover sharpness, restore clarity, and transform an imperfect photo into one that is both shareable and professional-looking. With just a little effort, you can turn a blurred snapshot into an image worth keeping.
Understanding how to edit blurry photos isn’t just about cosmetic improvement. Clear, sharp images matter in countless ways. From building trust in online sales to creating polished social media posts, photo quality has a direct impact on how others perceive your work. Blurry pictures often signal carelessness or lack of skill, even if the subject or composition is strong. By taking time to learn editing strategies, you not only save photos you might have discarded, but also improve your overall presentation and credibility in both personal and professional contexts.
There are many reasons photos turn out blurry—camera shake, low light, slow shutter speeds, or simply a moving subject. Luckily, there are just as many ways to fix them. From quick smartphone apps to professional editing software, you’ll find options to suit every need and budget. Learning how to edit blurry photos is less about complicated tricks and more about applying the right adjustments, like sharpening filters, contrast balancing, and noise reduction. These small steps, when used together, can make a dramatic difference in image quality.
This guide will walk you through everything you need to know: why photo clarity matters, the common mistakes people make when trying to fix blur, and a step-by-step approach using tools you already have access to. Along the way, we’ll highlight pro tips and preventive measures so you won’t face the same problem again. By the end, you’ll feel confident in your ability to edit blurry photos and preserve those important memories instead of losing them to poor focus.
Why Fixing Blurry Photos Matters
At first glance, a blurry picture might seem like a small inconvenience, but in reality, it can have a much larger impact than most people realize. Knowing how to edit blurry photos is important because clear, sharp images are not only more visually appealing, they also carry greater meaning and value. Whether it’s a family portrait, a wedding memory, or a business product shot, the difference between a sharp photo and a blurry one often determines whether the image is cherished, shared, or discarded. When you put effort into capturing special moments, having them ruined by blur can feel disheartening. That’s why learning how to fix these photos is so worthwhile.
In the digital world, clear images are also tied to credibility. Businesses that display blurry product photos often struggle to gain customer trust, as low-quality visuals can make even the best items look unprofessional. Social media influencers and content creators face a similar challenge—audiences are drawn to crisp, engaging images, and blurry uploads can hurt engagement and growth. Understanding how to edit blurry photos can give you a competitive edge, whether you’re building a brand, running an online shop, or simply trying to make your personal feed look more polished.
Another reason fixing blurry images matters is emotional value. Family snapshots, travel adventures, or once-in-a-lifetime events are often captured spontaneously. If those moments end up blurry, they can feel lost forever. Fortunately, editing software and apps make it possible to salvage these memories. By learning how to edit blurry photos, you give yourself a chance to preserve the emotions and stories behind them. Even if the fix isn’t perfect, improving clarity can be enough to make a picture worth framing or revisiting later.
Finally, improving your ability to edit blurry photos enhances your overall photography skills. By practicing editing, you also learn what causes blur in the first place and how to avoid it. This dual benefit—saving old photos and preventing new mistakes—makes the effort even more valuable. Clear, sharp images are not just about aesthetics; they impact communication, credibility, and emotional connections. That’s why photo clarity matters, and why learning to sharpen, enhance, and restore images is a skill every modern photographer, amateur or professional, should master.
Common Mistakes When Trying to Edit Blurry Photos
When people first attempt to edit blurry photos, they often jump straight into the process without understanding how digital images work. One of the most common mistakes is over-sharpening. Many editing programs offer sharpening filters, but cranking these settings up too high creates unnatural results, leaving photos filled with halos, harsh lines, and visible noise. Instead of improving clarity, the image looks distorted, and in some cases, even harder to view. Effective sharpening requires a light touch, applied gradually and balanced with other adjustments like contrast and brightness.
Another mistake when trying to edit blurry photos is relying on just one tool or filter. For example, many beginners only use the “Sharpen” button in a mobile app, expecting miracles. But editing blurry images often requires multiple tweaks working together—slight adjustments in structure, texture, noise reduction, and contrast all contribute to better results. Using only one effect rarely produces the professional-quality outcome people expect. In fact, focusing on just one filter can exaggerate flaws in the image, making blur even more noticeable.
A third error is ignoring the original photo’s resolution. When you edit blurry photos, enlarging a low-resolution image too much often worsens the problem. Pixelation and digital artifacts appear, creating a blocky or grainy look. This happens because the software is trying to “guess” missing information. A better approach is to keep the image close to its original size and work with subtle enhancements rather than stretching it beyond its limits. Upscaling should be reserved for AI-driven tools designed specifically to handle low-resolution images.
Finally, many people forget that editing is not magic. Sometimes, the expectation is that any blurry image can be restored to perfect clarity. This leads to frustration when results don’t meet unrealistic standards. While software can significantly improve image quality, there are limits. Recognizing these boundaries helps you focus on salvaging what’s possible instead of chasing perfection. By avoiding over-sharpening, relying on a single tool, enlarging too much, or expecting flawless results, you’ll learn smarter ways to edit blurry photos and achieve results that look natural and polished.
Step-by-Step Guide: How to Edit Blurry Photos
Step 1: Use Built-In Editing Tools
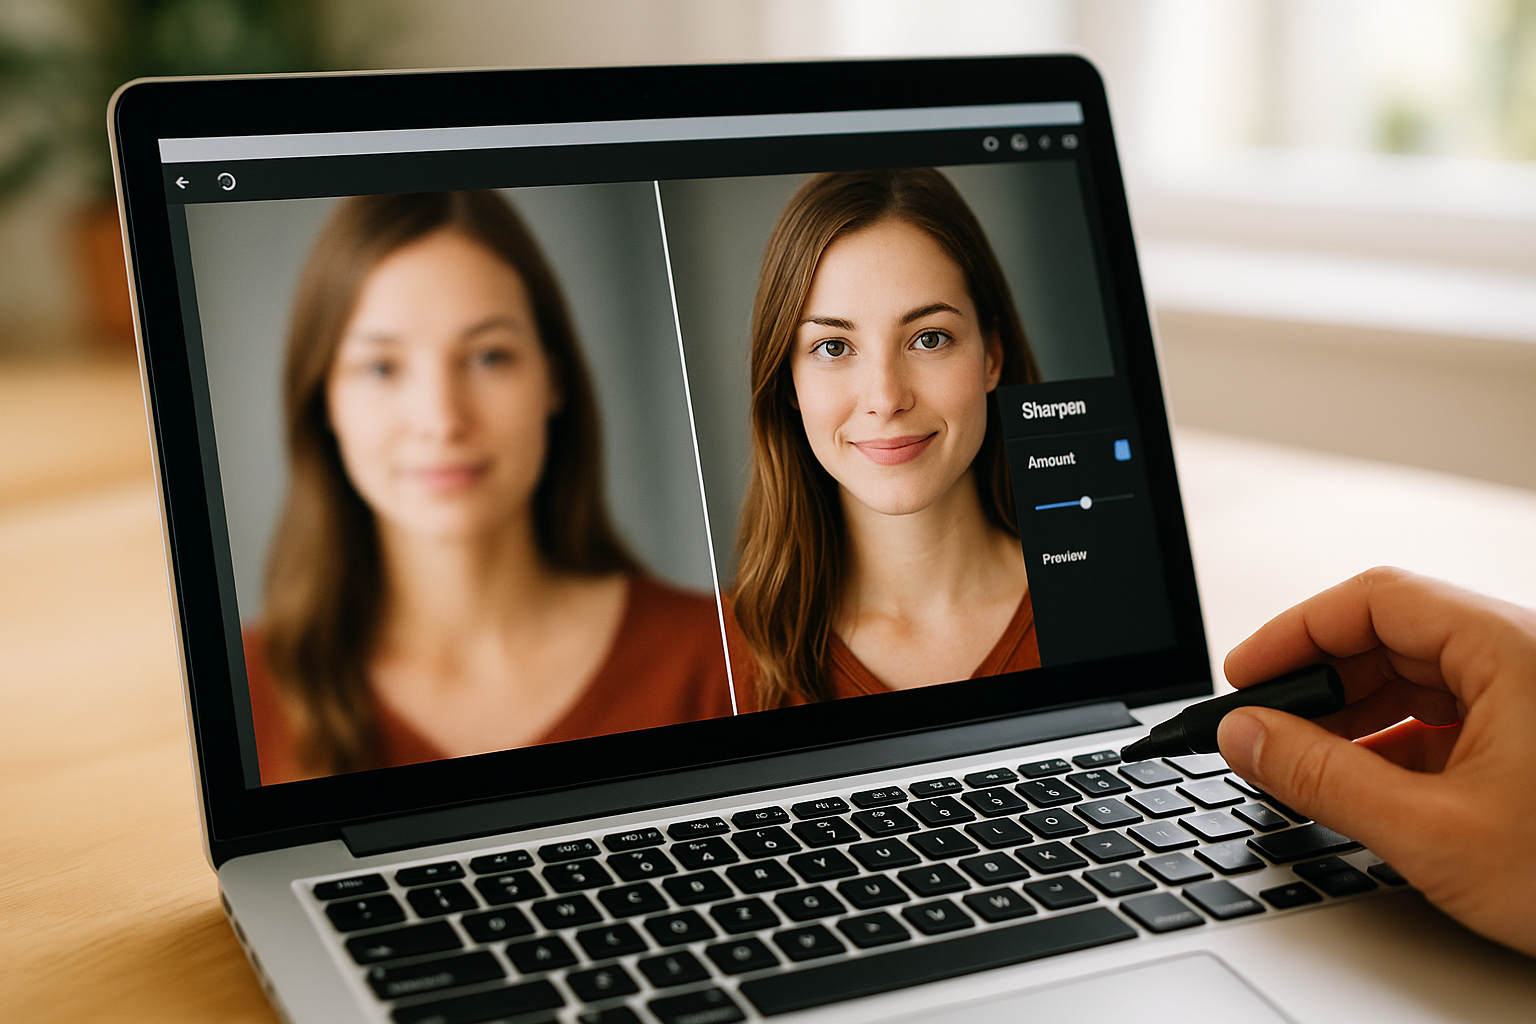
The simplest way to start learning how to edit blurry photos is by using the tools already available on your smartphone or computer. Nearly every modern device comes with a photo editor that includes basic features like sharpening, contrast adjustment, and clarity enhancements. While these tools may seem limited compared to advanced software, they can produce impressive improvements when used correctly. The key is to make subtle changes rather than dramatic ones. Small adjustments often deliver the most natural-looking results and can make a blurry image significantly clearer without introducing distortions.
Begin by opening the image in your device’s photo editor. Look for a sharpening option, sometimes called “Details” or “Clarity.” Increase the setting gradually while zooming in to monitor the results. If you push the slider too far, the photo may appear grainy or artificial. Once you’ve sharpened the image, balance it out by adjusting contrast and brightness. Enhancing contrast makes edges more defined, while adjusting brightness ensures details aren’t lost in shadows or blown out by highlights. Together, these small edits go a long way toward rescuing blurry pictures.
Another important feature in many built-in editors is noise reduction. When you edit blurry photos, sharpening often introduces digital noise—random specks of color that weren’t there originally. Applying noise reduction after sharpening helps smooth out these imperfections, giving the picture a cleaner, more professional finish. Again, moderation is essential. Too much noise reduction can erase fine details, leaving the photo looking flat or plastic-like. The goal is to strike a balance between clarity and smoothness, so your image looks realistic rather than over-processed.
Finally, don’t overlook cropping. Sometimes the blur is most noticeable around the edges of a photo. By cropping into the sharpest part of the image, you can salvage a strong composition even if the whole picture can’t be saved. This trick is especially useful for portraits or close-ups where the subject remains the focus. With just sharpening, contrast, noise reduction, and cropping, you can dramatically improve image quality using nothing more than the tools built into your device. For beginners, this is the most accessible way to learn how to edit blurry photos and build confidence before moving on to more advanced techniques.
Step 2: Enhance with Advanced Software
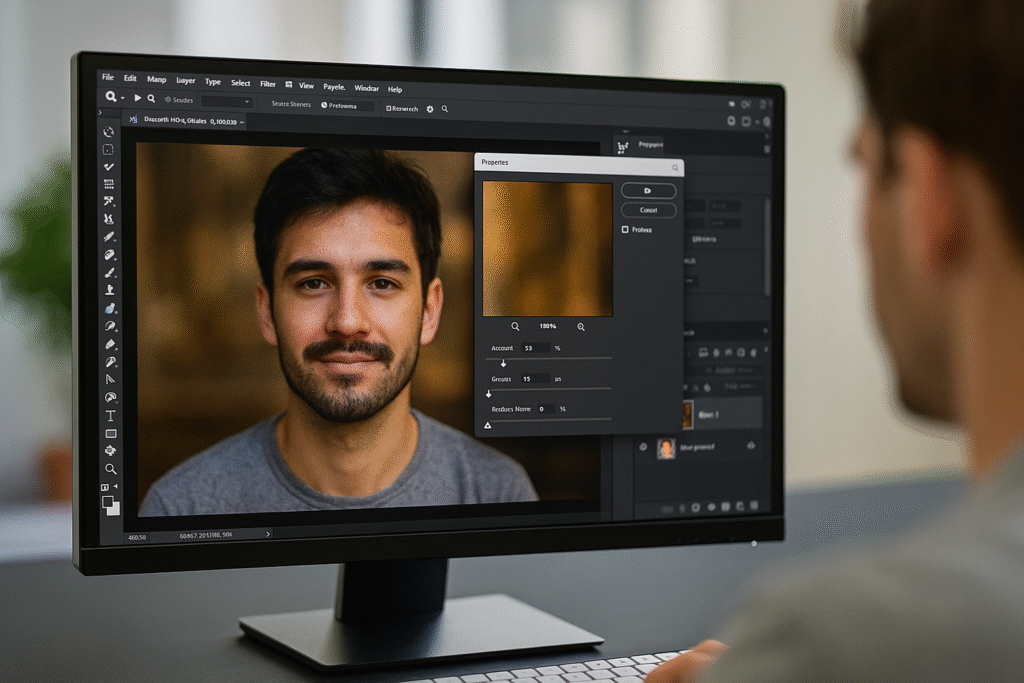
Once you’ve experimented with built-in tools, the next level in learning how to edit blurry photos is using advanced software like Adobe Photoshop, Lightroom, or GIMP. These programs provide much greater control, offering specialized filters and adjustment layers that allow you to sharpen selectively, restore detail, and fine-tune contrast with precision. Unlike basic apps that apply changes globally, professional software enables you to target specific areas of the photo—such as faces or objects—while leaving the background untouched. This creates a natural effect and prevents the entire image from looking over-processed.
A common starting point in Photoshop is the “Unsharp Mask” or “Smart Sharpen” filter. These tools let you control the amount, radius, and threshold of sharpening. Increasing the amount sharpens edges, while the radius determines how wide the sharpening effect spreads. Threshold helps prevent noise from being exaggerated. By carefully balancing these three controls, you can significantly improve clarity. Another advanced option is using high-pass filters. By duplicating the photo layer, applying a high-pass filter, and setting the blend mode to “Overlay,” you can restore sharpness in a more subtle, controlled way.
Another advantage of advanced programs when you edit blurry photos is access to AI-powered features. Many tools now include automatic enhancement options that analyze the photo and apply targeted adjustments. For instance, Photoshop’s “Super Resolution” uses machine learning to upscale and sharpen low-quality images, while Lightroom’s AI-driven noise reduction smooths grain without destroying important details. Free tools like GIMP and online editors such as Fotor or Pixlr also provide effective sharpening and noise reduction features, making advanced editing accessible even without a paid subscription.
Advanced software also allows for selective editing using masks and brushes. This means you can sharpen only the subject’s eyes in a portrait while leaving the skin soft, creating a natural look. Similarly, you can adjust texture and clarity in landscapes to highlight specific details like trees or buildings. Learning these techniques takes practice, but the results are far superior to blanket edits. With advanced tools, you gain the flexibility to improve photos without introducing artificial-looking effects. For anyone serious about photography, mastering these programs is the best way to consistently edit blurry photos with professional results.
Step 3: Prevent Future Blurry Photos
While it’s useful to know how to edit blurry photos, prevention is always the smarter approach. No matter how advanced editing software becomes, the best results come from capturing clear, sharp images in the first place. Preventing blur saves time, reduces frustration, and ensures your photos look professional from the moment they’re taken. To do this, you need to understand the common causes of blur—camera shake, subject movement, low light, and poor focus—and apply techniques to reduce their impact. By combining good shooting habits with the right equipment, you’ll spend less time editing and more time enjoying crisp, clear pictures.
The first step to prevention is stabilizing your camera. Many blurry images come from unsteady hands, especially in low-light situations. Using a tripod or even resting your camera on a stable surface drastically improves clarity. For smartphone users, holding the device with both hands and keeping elbows close to your body provides extra stability. Some cameras and phones include image stabilization features—be sure to enable them when possible. These small changes dramatically reduce the need to edit blurry photos later.
Lighting also plays a huge role in preventing blur. In darker environments, cameras use slower shutter speeds to let in more light, which increases the risk of motion blur. The solution is to add light whenever possible. Move closer to a window, turn on additional lamps, or use a flash when appropriate. For outdoor photography, taking advantage of daylight hours makes a big difference. By providing enough light, the camera can use faster shutter speeds, reducing the chance of blur and eliminating the need for heavy editing afterward.
Focus accuracy is another crucial factor. Many people rely solely on automatic focus, but this doesn’t always lock onto the subject correctly. Taking a moment to tap your subject on a smartphone screen or adjusting focus manually on a DSLR ensures your main subject is sharp. Burst mode is another useful trick—capturing several photos in quick succession increases the chances of at least one being perfectly sharp. Instead of constantly needing to edit blurry photos, you’ll have sharp originals ready to use.
Finally, practice makes perfect. Developing steady hands, learning camera settings, and experimenting with different shooting conditions improve your skills over time. By preventing blur at the source, you build a stronger photography foundation and save countless hours in post-production. In short, while editing skills are valuable, mastering prevention ensures you rarely need to rescue images in the first place.
FAQs About Editing Blurry Photos
Can blurry photos be fixed completely?
One of the most common questions about how to edit blurry photos is whether they can ever be fully restored to perfect clarity. The short answer is no—once detail is lost due to camera shake or focus issues, it cannot be completely recreated. However, modern software and apps can improve photos dramatically. Sharpening tools, AI-powered upscaling, and contrast adjustments can restore enough detail for the image to be usable, printable, or shareable online. The key is to manage expectations: editing improves clarity but won’t make an out-of-focus picture look like it was shot with professional precision.
What are the best free tools to edit blurry photos?
Many people assume you need expensive programs to edit blurry photos, but there are plenty of free tools that do a great job. GIMP is one of the most popular free alternatives to Photoshop, offering advanced sharpening and masking features. Online editors like Fotor and Pixlr provide simple sharpening filters and noise reduction for quick fixes. Even smartphone apps such as Snapseed and Lightroom Mobile offer professional-grade clarity and sharpening controls at no cost. While paid tools often provide more advanced AI features, free options are often enough for casual users.
How can I avoid making photos look unnatural while editing?
A frequent challenge when you edit blurry photos is balancing sharpness with realism. Over-sharpening often creates halos around objects and makes noise more visible. To avoid this, apply sharpening gradually and combine it with noise reduction and contrast adjustments. It’s also helpful to work in small increments, zooming in and out to see the overall effect. If you only sharpen certain parts of the image—like eyes in a portrait—you can maintain a natural look while improving clarity where it matters most. Subtlety is the secret to avoiding unnatural results.
Do AI tools really work for fixing blurry photos?
Yes, AI-based editing tools have transformed how people edit blurry photos. Applications like Photoshop’s Super Resolution, Topaz Sharpen AI, and Luminar Neo use machine learning to analyze blurry images and restore details in ways traditional filters can’t. These tools can upscale low-resolution photos, reduce motion blur, and even reconstruct textures. While they are not perfect and sometimes add artifacts, they usually outperform manual sharpening alone. For users with many blurry photos to fix, AI-powered solutions save time and often deliver more natural results.
Is it better to fix blurry photos or retake them?
Deciding whether to edit blurry photos or retake them depends on the situation. For casual snapshots, editing often works well enough, especially with today’s powerful tools. However, for important projects like product listings, professional portfolios, or client shoots, retaking the photo under better conditions usually produces the best results. Retaking ensures sharp, clean images without the risk of over-editing. Editing is valuable when retaking is impossible—like travel photos or once-in-a-lifetime moments—but prevention and proper technique during shooting will always beat post-production fixes.
Conclusion
Mastering how to edit blurry photos is a skill that pays off in countless ways. From saving irreplaceable family memories to producing professional-looking content for business or social media, the ability to enhance and sharpen images gives your photos a second chance. While not every blurry picture can be restored to perfect clarity, editing techniques such as sharpening, noise reduction, AI-powered tools, and selective adjustments can dramatically improve their quality. More importantly, learning editing skills helps you understand the causes of blur, which makes it easier to prevent the problem in future shots.
The key takeaway is balance. When you edit blurry photos, subtle, thoughtful adjustments usually create the best results. Over-sharpening or relying on a single filter often makes things worse. Combining multiple small enhancements is far more effective and produces natural-looking images. At the same time, prevention—steady hands, good lighting, and correct focus—remains the most reliable way to ensure sharp photos every time. Editing is a valuable backup, but prevention makes editing less necessary in the first place.

By practicing how to edit blurry photos consistently, you build confidence and improve both your editing and photography skills. You’ll find that fewer images end up discarded, and more are ready to print, share, or post online. Even if you only rescue part of an image, the improvement is often enough to make the photo meaningful again.
📌 Read Similar Topics
- Dead Pixel Test
- Fix Burn Hole on Couch
- How to Fix a Tear in Leather Shoes
- Marble Scratch Repair
- Unsticking a Zipper
For further insights on sharpening and editing techniques, check these helpful resources:
Adobe Guide to Sharpening and Blur Tools,
Nikon Tips to Reduce Blurry Photos, and
Wikipedia on Digital Image Processing.
In conclusion, clear and sharp images are always worth striving for. By learning how to edit blurry photos effectively and practicing prevention during shooting, you’ll ensure your photography continues to improve and your memories remain crisp, vivid, and timeless.


Pingback: How To Get Sticky Residue Off Plastic Easily With Proven Fixes
Pingback: Download GIF From Tweet Easily With Proven Tricks
Pingback: Fix Error 0x0000011b: Solve Windows Printer Issues Easily
Pingback: Fix Black Screen Flashing Issue Quickly With Easy Solutions