Jewelry holds a special place in our lives, and elastic bracelets are often cherished for their sentimental value and versatility. However, over time, the elastic can wear out, leaving you with the task of restringing elastic bracelet strands to restore their beauty and function. This process may seem intimidating, but with the right guidance, it’s simple, enjoyable, and highly rewarding.
Restringing elastic bracelet strands is not just about repair; it’s also a chance to refresh your bracelet’s design or improve its durability. Whether you’re fixing a beloved heirloom or giving a new twist to a favorite accessory, the steps to restring an elastic bracelet are straightforward and satisfying. This guide provides detailed instructions, helpful tips, and tricks to make the process seamless.
With our step-by-step approach, you’ll learn how to handle various challenges, from selecting the right elastic cord to knotting securely. Restringing elastic bracelet techniques are not only practical but also an opportunity to express creativity. Dive in and give your cherished pieces a new lease on life!
Choosing the Right Materials for Restringing Elastic Bracelet
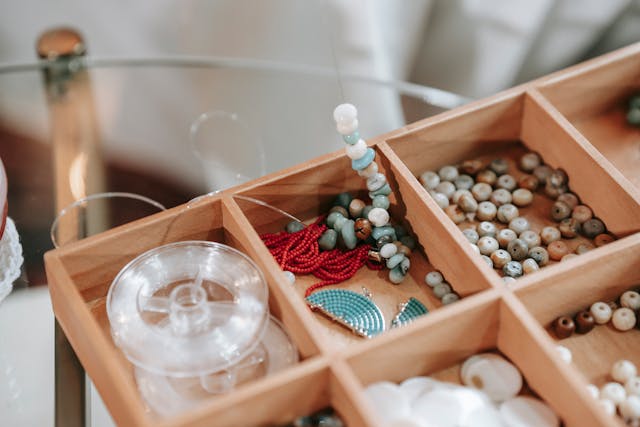
Restringing elastic bracelet projects begin with selecting the appropriate materials. Here’s what you’ll need:
- Elastic Cord: Choose a high-quality, stretchy cord. Popular options include 0.5mm or 1mm cords, depending on the bead hole size.
- Beads: Use your original beads or incorporate new ones for a refreshed look.
- Needle: A beading needle helps thread beads easily.
- Scissors: Sharp scissors ensure a clean cut for knotting.
- Glue: Jewelry glue secures knots for durability.
Investing in quality materials ensures your bracelet withstands daily wear.
Preparing Your Beads for Restringing Elastic Bracelet
Proper preparation makes the restringing elastic bracelet process smoother:
- Clean Your Beads: Wash beads with mild soap and water to remove dirt or residue.
- Organize by Size: Sorting beads simplifies the threading process and maintains your design.
- Inspect for Damage: Discard cracked or broken beads to ensure bracelet durability.
Preparation lays the foundation for a flawless and secure bracelet.
Measuring and Cutting the Elastic Cord
Precision is key when measuring the elastic cord:
- Measure Your Wrist: Add 3-4 inches to your wrist circumference to allow for knotting.
- Cut the Cord: Use sharp scissors for a clean cut, preventing fraying.
- Stretch the Cord: Pre-stretch the cord to prevent slack in the finished bracelet.
Accurate measurement guarantees a comfortable and well-fitted bracelet.
Designing Your Bracelet
Creativity shines during this stage of restringing elastic bracelet tasks:
- Plan the Pattern: Lay beads on a flat surface to arrange your desired pattern.
- Mix and Match: Combine colors, shapes, and sizes for a unique look.
- Test the Design: Thread a few beads onto the cord to preview the final appearance.
Taking time to design enhances the aesthetic appeal of your bracelet.
Threading the Beads onto the Elastic Cord
Efficient threading is essential in restringing elastic bracelet projects:
- Use a Needle: A beading needle speeds up the process, especially for small beads.
- Thread in Sections: Work in manageable sections to maintain control.
- Adjust Spacing: Ensure beads fit snugly but can move slightly for flexibility.
Smooth threading ensures the bracelet maintains its structure and comfort.
Securing the Knots for Restringing Elastic Bracelet
Knots are the backbone of restringing elastic bracelet stability:
- Tie a Surgeon’s Knot: This knot provides extra security compared to a standard knot.
- Apply Glue: A dab of jewelry glue prevents the knot from loosening.
- Trim Excess Cord: Cut any excess cord close to the knot without compromising its integrity.
Proper knotting techniques ensure your bracelet remains secure and long-lasting.
Testing and Adjusting the Bracelet
Testing prevents future issues in restringing elastic bracelet projects:
- Gently Stretch: Check for even tension and knot security.
- Inspect for Gaps: Ensure beads sit snugly without visible cord gaps.
- Re-knot if Needed: Retie knots if you notice any looseness.
Testing guarantees the bracelet’s durability and comfort.
Maintaining Your Restringed Elastic Bracelet
Maintenance is crucial for prolonging the life of your bracelet:
- Avoid Excess Stretching: Take care when putting on or removing the bracelet.
- Clean Gently: Wipe with a soft cloth and avoid harsh chemicals.
- Store Properly: Keep in a jewelry box or pouch to prevent damage.
Following these tips keeps your bracelet looking beautiful for years.
Benefits of Restringing Elastic Bracelet
Restringing elastic bracelet projects offer numerous advantages:
- Sentimental Value: Restore cherished pieces to their original charm.
- Cost-Effective: Save money by repairing rather than replacing.
- Personalization: Customize designs to suit your style.
These benefits make restringing elastic bracelets a worthwhile endeavor.
Conclusion: Restringing Elastic Bracelet
Restringing elastic bracelet strands is a rewarding process that combines creativity and practicality. By following this comprehensive guide, you’ve gained the knowledge to choose the right materials, design with flair, and secure your bracelet for durability. Each step, from threading beads to knotting securely, ensures your bracelet is both beautiful and long-lasting.
Beyond repair, restringing elastic bracelets allows you to express your unique style and breathe new life into treasured accessories. With proper maintenance, your revamped bracelet can remain a beloved part of your jewelry collection for years to come.
Embrace the opportunity to restore, redesign, and rejoice in the art of restringing elastic bracelets!