Unstick A Blender Blade: A Comprehensive Guide
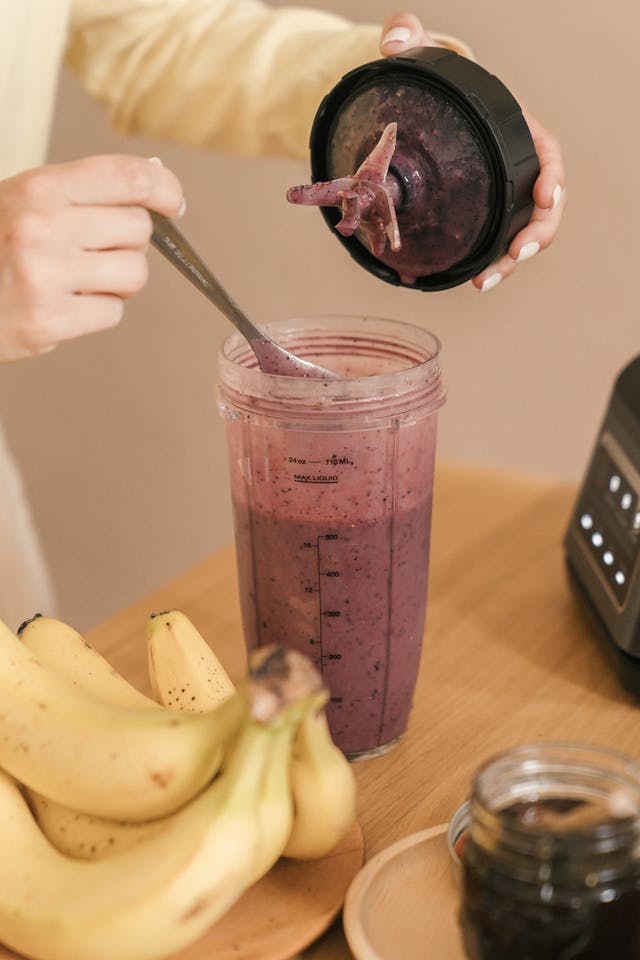
Blenders are essential appliances in many kitchens, helping to create everything from smoothies to soups. However, like all appliances, they can sometimes experience problems. One of the most common issues blender owners encounter is a stuck blender blade. If you’ve ever struggled to unstick a blender blade, you know how frustrating it can be. Whether you’re trying to blend a tough ingredient or the blade is simply jammed, the process can be time-consuming and annoying. In this article, we will walk you through everything you need to know about how to unstick a blender blade, troubleshooting tips, and methods you can use to prevent the issue in the future.
Understanding Why Blender Blades Get Stuck
Before we dive into the solutions, it’s crucial to understand why your blender blades might get stuck in the first place. A stuck blender blade can happen for various reasons. Often, it’s due to food getting trapped around the blades, creating a blockage. Other times, it might be the result of a mechanical issue such as a damaged motor, worn-out bearings, or the blades themselves becoming misaligned. Sometimes the blade can become stuck due to food particles getting stuck underneath or even dried food.
In some cases, the problem could be related to overuse, where the motor or blade assembly has become worn down and less efficient. Food such as frozen fruits or vegetables, nuts, and seeds can be especially challenging for the blades to process, leading to them becoming jammed. Knowing why the blade becomes stuck will help you take the right steps to unstick a blender blade and prevent it from happening again.
How to Unstick a Blender Blade
The process of unstick a blender blade can vary depending on the cause of the issue. Here are several methods you can use to unstick a blender blade and restore your appliance to working condition.
Method 1: Manual Methods to Unstick a Blender Blade
One of the first things you can try when your blender blade is stuck is using your hands or basic tools to gently move the blade. Here’s how you can do this:
Unplug the Blender: Always start by ensuring the blender is unplugged before attempting to fix any issues. This is essential for your safety.
Disassemble the Blender: Remove the blender jar from the base and then take out the blade assembly. If your blender is not removable, check the manufacturer’s instructions for disassembly.
Clean the Blade: Often, food can get caught in the grooves around the blade. Carefully wash the blade under warm water and scrub it with a brush to loosen any particles or stuck foods. You may also soak the blade in warm, soapy water for 15-20 minutes to loosen debris.
Gently Tap the Blade: Use a rubber mallet or wooden spoon to gently tap the sides of the blender jar. This can help dislodge any food or ice cubes stuck around the blade. If necessary, you can also use a butter knife or another blunt tool to loosen anything that may have hardened around the blade.
Apply Lubrication: If the blade is rusted or jammed due to a lack of lubrication, you can apply a small amount of cooking oil or vegetable oil around the blade’s mechanism. Be cautious, as too much oil could create a mess.
Rotate the Blade: Gently try to rotate the blade in both directions to see if it loosens. If there’s resistance, try a little more force until it moves freely.
Method 2: Use a Heat Treatment to Loosen Stuck Blades
If manual methods don’t seem to work, applying heat to the stuck blade can sometimes help loosen any hardened or stuck food. Here’s how:
Use Warm Water: Fill the blender jar with warm (not boiling) water and let it sit for 5-10 minutes. The warm water will soften the stuck ingredients and may allow the blade to move more freely.
Boil Water for Stubborn Food: If warm water isn’t enough, try boiling a small amount of water and carefully pour it into the blender jar. The heat can help dissolve stuck food and loosen the blade.
Soak the Blade: After applying heat, let the blade sit for a few minutes to allow the temperature to break down any food debris. Then attempt to unstick a blade by tapping or manually moving it again.
Method 3: Disassemble and Inspect the Blade Mechanism
Sometimes the blade becomes stuck due to a mechanical issue, such as a worn-out bearing or broken part. In these cases, you may need to disassemble the entire blade mechanism to check for damage.
Examine the Blade Assembly: Once you have removed the blade from the jar, look for any visible signs of wear, rust, or misalignment. If the blade is broken or cracked, you may need to replace it entirely.
Check the Shaft: If your blender blade is attached to a shaft, inspect the shaft for signs of damage, rust, or wear. This can affect the performance of the blade and may be the reason it’s stuck.
Replace Parts: If you notice damaged parts, consider replacing them. Some manufacturers sell individual replacement parts for the blades, motor, or shaft. Follow your blender’s manual for detailed instructions on how to replace damaged parts.
Method 4: Consult a Professional Repair Technician
If none of the above methods work or if you notice significant damage to the motor or blades, it may be time to consult a professional. An expert technician can diagnose the issue and provide solutions that you might not have considered.
Preventing Blender Blades from Getting Stuck
While unstick a blender blades is helpful, it’s even better to prevent them from becoming stuck in the first place. Here are a few tips to help you avoid blade jams in the future:
Don’t Overfill the Blender: Always follow the manufacturer’s instructions for how much to fill the blender jar. Overfilling can cause excessive pressure on the blades and motor, making it more likely for the blade to become stuck.
Use Proper Ingredients: Certain foods, like nuts, seeds, and frozen items, can be particularly challenging for blender blades. To avoid damaging the blades or causing a jam, try to cut these ingredients into smaller pieces before adding them to the blender.
Clean the Blade Regularly: Keeping the blender blade clean is crucial to prevent food debris from getting stuck. After every use, disassemble the blender and clean the blade thoroughly.
Lubricate the Blade Mechanism: Periodically apply a small amount of cooking oil or another type of lubricant to the blade mechanism to keep it operating smoothly.
Regularly Inspect the Blade and Parts: Check the blade and motor shaft regularly for any signs of wear and tear. This will allow you to catch any potential problems early and replace worn-out parts before they cause the blade to become stuck.
Conclusion: How to Unstick a Blender Blade and Prevent Future Problems
In conclusion, a stuck blender blade is a common problem that can usually be resolved with a little patience and the right approach. By following the methods outlined above—such as cleaning, applying heat, and inspecting the blade assembly—you can restore your blender to working condition. Additionally, taking steps to prevent your blender blade from becoming stuck in the future, like using the right ingredients and regularly maintaining your appliance, will help extend its lifespan and ensure smooth blending every time. So, if you ever find yourself dealing with a stuck blender blade again, you’ll be well-equipped to handle the situation with ease.
FAQ
1. Why does my blender blade keep getting stuck? Blender blades may get stuck due to food buildup, ice blockages, or mechanical issues such as a worn-out motor. Frozen ingredients or thick foods like nuts and seeds can create additional resistance.
2. How do I safely unstick a blender blade? Always unplug the blender and try gently tapping the blade or soaking it in warm water to loosen stuck debris. If needed, apply lubrication or disassemble the blade mechanism for further inspection.
3. Can I fix my stuck blender blade myself? Yes, many stuck blade issues can be resolved at home using the methods mentioned above, such as cleaning the blade, soaking it in water, or rotating the blade manually.
4. How can I prevent my blender blade from getting stuck again? To prevent the issue, avoid overfilling the blender, use the right ingredients, regularly clean the blade, and inspect the appliance for wear and tear.
5. When should I replace the blender blade? If your blender blade is cracked, rusted, or severely damaged, it may be time to replace it. Regular maintenance and care can help extend the lifespan of your blender.

Share this:
- Click to share on Facebook (Opens in new window) Facebook
- Click to share on X (Opens in new window) X
- Click to share on LinkedIn (Opens in new window) LinkedIn
- Click to share on Reddit (Opens in new window) Reddit
- Click to share on X (Opens in new window) X
- Click to share on Threads (Opens in new window) Threads
- Click to share on WhatsApp (Opens in new window) WhatsApp


