Introduction: The Importance of Knowing How to Transfer Video from JVC Camcorder to a Laptop
Capturing high-quality video footage with a JVC camcorder allows you to preserve important memories or create professional-grade content. However, to make the most of your recordings, it is essential to know how to transfer video from JVC camcorder to a laptop. Whether you are a hobbyist looking to edit your videos or a professional preparing content for clients, transferring your footage efficiently is a crucial step.
Knowing how to transfer video from JVC camcorder to a laptop also opens up a world of editing possibilities. Once the video is on your laptop, you can work with it in video editing software to enhance it, cut unwanted segments, and add effects. Learning how to transfer video from JVC camcorder to a laptop is a skill that will serve you well in both personal and professional contexts.
In this guide, we will take you through the entire process of transferring video from your JVC camcorder to a laptop. From understanding the necessary equipment to using the right software and troubleshooting common issues, you’ll be equipped to handle any task related to transferring videos with ease. Let’s dive into the steps and techniques to get your videos onto your laptop without hassle.
Step-by-Step Guide to Transfer Video from JVC Camcorder to a Laptop
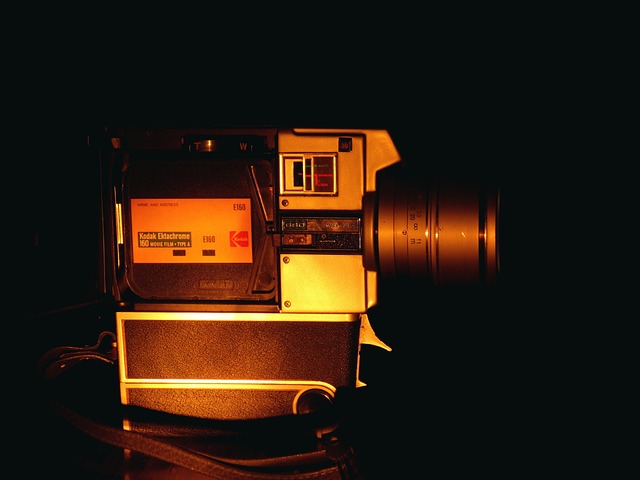
1. Understanding the Required Equipment to Transfer Video from JVC Camcorder to a Laptop
Before transferring video from JVC camcorder to a laptop, it’s important to ensure that you have the right equipment. This includes the appropriate cables, a working laptop, and the necessary software to facilitate the process. Typically, you will need:
- A USB cable or FireWire cable: Depending on the model of your JVC camcorder, you may need a USB or FireWire cable to connect the camcorder to your laptop.
- JVC camcorder with recorded footage: Of course, you’ll need your camcorder to have videos that you intend to transfer.
- Laptop with sufficient storage space: Make sure your laptop has enough space to accommodate the videos you wish to transfer.
Once you have these items in place, you’ll be ready to move on to the next step in learning how to transfer video from JVC camcorder to a laptop.
2. How to Connect JVC Camcorder to Laptop for Video Transfer
The first crucial step in learning how to transfer video from JVC camcorder to a laptop is connecting the two devices. Depending on your camcorder model, this can vary slightly, but the general process remains the same.
- For USB Connections: Plug one end of the USB cable into the camcorder and the other into the laptop. Once connected, your laptop should recognize the camcorder as an external device.
- For FireWire Connections: If your camcorder and laptop support FireWire, use the FireWire cable to establish a connection. FireWire can offer faster transfer speeds, which is beneficial for transferring large video files quickly.
Once the connection is established, turn on the JVC camcorder and ensure it is set to “Play” or “PC Connect” mode to allow your laptop to access the footage.
3. Installing and Using the Software for Video Transfer
JVC camcorders typically require specific software to transfer video to your laptop. This software can vary depending on the camcorder model, but many JVC camcorders are compatible with programs like:
- JVC’s own software (e.g., Everio MediaBrowser): This software often comes bundled with your camcorder and is designed to transfer files easily.
- Third-party software: If JVC’s software isn’t available or doesn’t work for your laptop’s operating system, programs like Windows Movie Maker, iMovie (for Mac users), or Adobe Premiere Pro can help facilitate video transfers.
Once the software is installed, open it and follow the on-screen instructions to begin transferring video from your JVC camcorder to your laptop.
4. Selecting the Files You Want to Transfer
Once your JVC camcorder is connected to your laptop, it’s time to select the videos you wish to transfer. Depending on your software, you might see thumbnails or file names listed. To ensure you’re selecting the correct footage, carefully preview the clips before proceeding with the transfer.
You can select individual clips or entire video folders, depending on your needs. If you plan on transferring a large number of files, it may be more efficient to batch the transfers.
5. Transferring the Videos to Your Laptop’s Storage
After selecting the video files, the next step is to initiate the transfer. Click on the “Transfer” or “Import” button within your software, and the videos will begin to move from your JVC camcorder to the laptop.
The transfer speed will vary depending on the video file size and the type of connection being used. If you’re using a USB connection, transfers may take longer compared to FireWire.
Ensure that the connection remains intact during the transfer to avoid corrupting your files. Once the transfer is complete, you should be able to access the videos on your laptop.
6. Troubleshooting Common Issues When You Transfer Video from JVC Camcorder to a Laptop
When learning how to transfer video from JVC camcorder to a laptop, you may encounter several issues. Some common problems include:
- Camcorder not being recognized by the laptop: Make sure both devices are turned on and properly connected.
- Slow transfer speeds: Try using a FireWire connection if possible, or check if other programs are using system resources.
- Corrupt video files: Ensure that the transfer was completed successfully and that your camcorder has sufficient battery power to avoid interruptions.
If you encounter issues, consult the manual or JVC’s online support for additional troubleshooting tips.
7. Editing the Transferred Video on Your Laptop
After transferring your videos, you’ll want to edit them. Learning how to edit video is an essential skill for anyone working with footage from a camcorder. Use video editing software like Adobe Premiere Pro, Final Cut Pro, or free programs like Windows Movie Maker or iMovie to start editing your videos.
Editing may involve cutting out unwanted sections, adding music, titles, and transitions, or adjusting color settings. Once your video is edited, save the project and export the final product to your desired file format.
8. Organizing Your Video Files After Transfer
To keep things organized, it’s a good idea to create specific folders for your video files on your laptop. This will help you easily locate your footage in the future, especially when you have multiple video projects.
Consider categorizing your videos by project, date, or location, depending on your needs. Organizing your files will make it easier to access them when editing or sharing.
9. Backing Up Your Transferred Video Files
Once you’ve transferred video from JVC camcorder to a laptop, it’s crucial to back up your footage. Having a backup ensures that you won’t lose precious memories or important projects.
Use external hard drives, cloud storage services like Google Drive or Dropbox, or dedicated backup software to safeguard your video files. Regular backups can prevent data loss due to technical issues.
10. Exporting and Sharing Your Transferred Video
Once your video is edited and backed up, you may want to share it with others. Export your video in the desired format (e.g., MP4, MOV) and share it via email, social media, or video hosting sites like YouTube or Vimeo.
Sharing videos with others can be a great way to showcase your work or preserve memories for friends and family.
Conclusion: Mastering the Process to Transfer Video from JVC Camcorder to a Laptop
Now that you know how to transfer video from JVC camcorder to a laptop, you can confidently manage your footage and take full advantage of your JVC camcorder’s capabilities. Whether you are looking to edit your videos or simply back them up, this process ensures that your footage is safe, accessible, and ready to be used.
By following the steps outlined in this guide, you’ll be able to transfer video from your JVC camcorder to your laptop quickly and efficiently. Don’t forget to explore editing tools and take the time to organize and back up your footage for future use. With these tips, you’ll have complete control over your videos and can make the most out of your JVC camcorder.
Share this:
- Click to share on Facebook (Opens in new window) Facebook
- Click to share on X (Opens in new window) X
- Click to share on LinkedIn (Opens in new window) LinkedIn
- Click to share on Reddit (Opens in new window) Reddit
- Click to share on X (Opens in new window) X
- Click to share on Threads (Opens in new window) Threads
- Click to share on WhatsApp (Opens in new window) WhatsApp