Traeger Tray Cleaning Tips: Introduction
Accidentally melting plastic on your Traeger grill’s drip tray can be frustrating, but with the right approach, it’s completely fixable. Knowing effective Traeger tray cleaning tips helps you safely remove plastic residue without damaging your grill. Whether you’re a seasoned griller or a beginner, this guide walks you through step-by-step methods to clean your Traeger tray, maintain your equipment, and prevent future mishaps. Following these Traeger tray cleaning tips ensures your grill stays in excellent condition for years of delicious outdoor cooking.
Why Proper Traeger Tray Cleaning Tips Matter
Your Traeger grill’s drip tray catches grease and food drippings but can also collect melted plastic if items are left inside or liners shift. Improper cleaning can damage the tray or affect grill performance. That’s why following the right Traeger tray cleaning tips is essential to preserve your grill’s longevity and safety. Using harsh chemicals or abrasive tools can cause scratches or corrosion, so a gentle, methodical approach is best.
Step 1: Allow the Grill to Cool Completely
Before cleaning, make sure your Traeger grill is fully cooled and unplugged. This safety step is emphasized in every set of Traeger tray cleaning tips. Working on a hot grill risks burns and makes plastic residue harder to handle. Once cooled, the plastic hardens, making it easier to scrape off cleanly.
Step 2: Gently Scrape Off Hardened Plastic
Use a plastic scraper or non-metallic spatula to carefully lift and remove hardened plastic. Avoid metal tools or wire brushes, which can scratch the tray surface. This scraping process is key in effective Traeger tray cleaning tips because it removes most residue without harsh chemicals. Take your time and be gentle to protect the tray’s finish.
Step 3: Soak the Tray with a Natural Degreaser
After scraping, spray the affected area with an all-natural degreaser or a homemade mix of diluted dish soap and white vinegar. Let it soak for 10 to 15 minutes to soften remaining plastic. This step is crucial in many Traeger tray cleaning tips because it breaks down grease and plastic without damaging the tray. Wipe the tray with a damp cloth or sponge, repeating as needed until residue loosens.
Step 4: Optional Heat Treatment to Soften Residue
If plastic remains stubborn, carefully heat the grill on high for about 10 minutes to soften residue. Then turn it off and let it cool slightly before scraping again. This technique is recommended in advanced Traeger tray cleaning tips but should be done cautiously to avoid warping components. Always follow safety guidelines when heating your grill.
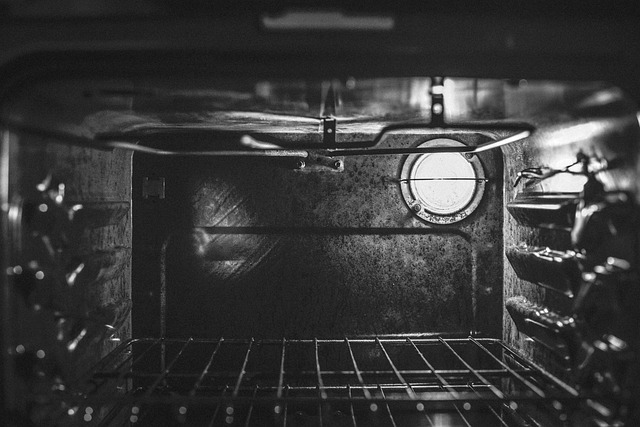
Step 5: Deep Clean the Drip Tray and Heat Baffle
Remove the drip tray and heat baffle for thorough cleaning. Wash with warm, soapy water using a non-abrasive sponge. Rinse well and dry completely before reinstalling. Using heavy-duty aluminum foil liners on the drip tray is a smart Traeger tray cleaning tip to prevent future plastic or grease buildup and simplify cleaning.
Step 6: Vacuum Ash and Debris Regularly
Maintaining a clean firepot and hopper is essential for grill performance. Use a vacuum designed for ash removal to clear pellet dust and ash regularly. This step is often included in comprehensive Traeger tray cleaning tips to keep your grill running efficiently and reduce buildup that complicates cleaning.
Step 7: Prevent Future Plastic Melting Incidents
Prevention is the best way to avoid cleaning melted plastic. Always check that no plastic utensils, wrappers, or liners remain inside before preheating. Using drip tray liners and keeping your cooking area organized are practical Traeger tray cleaning tips that save time and effort later.
Additional Tips for Maintaining Your Traeger Grill
Avoid harsh chemicals and abrasive scrubbers to protect your grill’s finish.
Clean your grill after every use to prevent grease and residue buildup.
Use Traeger’s official cleaning products for safe and effective results.
Store your grill covered or indoors during off-seasons to protect it from the elements.
Inspect your grill regularly for wear or damage and address issues promptly.
Troubleshooting Common Issues Related to Plastic Residue
If lingering odors or smoke persist after cleaning, it may be due to residual plastic or grease in hard-to-reach areas. Repeat soaking and scraping, and consider deep cleaning the grill’s interior components. If the tray surface is scratched or damaged, replacement might be necessary for optimal cooking. These troubleshooting steps are part of expert Traeger tray cleaning tips.
Conclusion: Traeger Tray Cleaning Tips for Long-Term Grill Care
Following these Traeger tray cleaning tips will help you safely and effectively remove melted plastic from your Traeger tray, keeping your grill in excellent working condition. Cooling the grill, gentle scraping, soaking with natural cleaners, and regular maintenance are key to preserving your equipment’s lifespan. Incorporate these tips into your routine to enjoy hassle-free grilling and delicious meals for years.