Introduction: Why Shower Glass Caulking Matters
Shower glass caulking is a crucial aspect of maintaining your bathroom’s cleanliness and functionality. Properly applied caulking not only enhances the appearance of your shower but also prevents water leakage, mold growth, and long-term structural damage. Whether you’re dealing with new shower installations or re-caulking an old one, mastering the art of shower glass caulking is essential for ensuring a watertight seal and a polished look.
When shower glass caulking deteriorates, it can result in water seeping into cracks and crevices, leading to costly repairs. Therefore, understanding the techniques and tools involved in shower glass caulking can save you time and money. This guide will walk you through the step-by-step process, common mistakes to avoid, and expert tips to achieve professional results.
In this comprehensive article, we will delve deep into everything you need to know about shower glass caulking. From selecting the right caulk to maintaining it for long-term durability, this guide covers it all. By the end, you’ll have a complete understanding of how to handle shower glass caulking like a pro.
Choosing the Right Caulk for Shower Glass Caulking
Types of Caulk
Selecting the correct type of caulk is the first step in ensuring effective shower glass caulking. Here are the most common types:
Silicone Caulk: Known for its durability and waterproof properties, silicone caulk is ideal for shower glass caulking. It provides excellent resistance to moisture and mold, making it a top choice for wet environments.
Acrylic Caulk: While easier to apply and clean up, acrylic caulk is less durable than silicone. It’s best used in areas with less exposure to water.
Hybrid Caulk: Combining the best of silicone and acrylic, hybrid caulk offers good adhesion, flexibility, and water resistance, making it another great option for shower glass caulking.
Factors to Consider When Choosing Caulk
Waterproofing: Ensure the caulk is labeled as 100% waterproof to prevent leaks.
Mold and Mildew Resistance: Opt for caulks with added mold inhibitors for long-lasting results.
Color Options: Choose a color that matches your shower’s aesthetic for a seamless look.
Flexibility: Look for flexible caulk to accommodate slight movements in the glass and frame.
Step-by-Step Guide to Shower Glass Caulking
Tools and Materials Needed
Before you begin, gather the following tools and materials:
Caulk (silicone, acrylic, or hybrid)
Caulking gun
Utility knife or razor blade
Masking tape
Cleaning solution (vinegar or alcohol-based)
Microfiber cloth
Caulk smoothing tool or your finger
Latex gloves
Preparing the Surface
Preparation is key to successful shower glass caulking. Follow these steps:
Remove Old Caulk: Use a utility knife or caulk remover tool to scrape away old caulk completely. Ensure no residue remains.
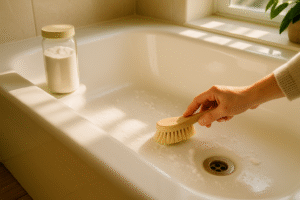
Clean the Surface: Wipe down the area with a cleaning solution to remove soap scum, grime, and mold.
Dry the Area: Ensure the surface is completely dry before applying new caulk to ensure proper adhesion.
Applying the Caulk
Load the Caulking Gun: Cut the tip of the caulk tube at a 45-degree angle and load it into the caulking gun.
Apply Masking Tape: Place masking tape along both sides of the area to ensure clean lines.
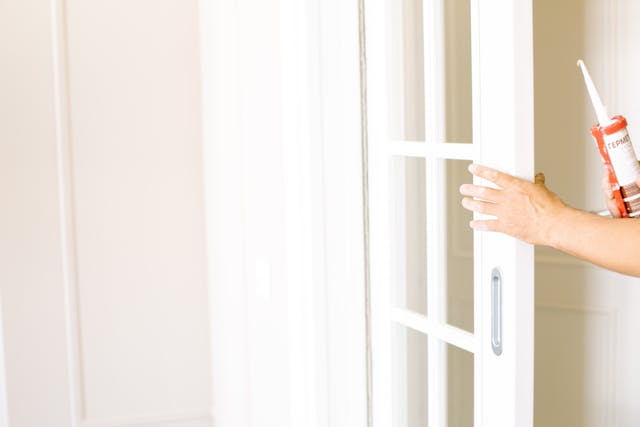
Apply the Caulk: Squeeze the caulking gun trigger evenly as you move along the seam, applying a continuous bead of caulk.
Smooth the Caulk: Use a caulk smoothing tool or your finger (dipped in soapy water) to smooth the bead and press it into the gap.
Remove the Tape: Carefully peel off the masking tape before the caulk begins to dry.
Curing and Cleanup
Allow the caulk to cure according to the manufacturer’s instructions (usually 24-48 hours).
Wipe away any excess caulk with a damp cloth before it hardens.
Common Mistakes to Avoid During Shower Glass Caulking
Using the Wrong Type of Caulk: Always use waterproof and mold-resistant caulk for showers.
Skipping Surface Preparation: Failing to clean and dry the surface can result in poor adhesion.
Applying Too Much Caulk: Excess caulk can create an unsightly mess and may not adhere properly.
Not Smoothing the Bead: An uneven bead can lead to gaps and leaks.
Rushing the Curing Process: Avoid using the shower until the caulk is fully cured.
Maintenance Tips for Long-Lasting Shower Glass Caulking
Regular Cleaning
Wipe down the caulked areas weekly to prevent mold and mildew buildup.
Use a non-abrasive cleaner to avoid damaging the caulk.
Inspect for Damage
Check for cracks, gaps, or discoloration in the caulk every few months.
Reapply caulk as needed to maintain a watertight seal.
Ventilation
Ensure proper ventilation in your bathroom to reduce humidity levels and extend the lifespan of your caulk.
FAQ: Shower Glass Caulking
How often should I replace shower glass caulking?
It depends on the type of caulk used and the bathroom’s humidity levels. Generally, caulk should be replaced every 5-10 years or when you notice signs of wear.
Can I apply new caulk over old caulk?
No, it’s essential to remove old caulk completely before applying new caulk to ensure proper adhesion.
What is the best caulk for shower glass caulking?
100% silicone caulk is the most reliable option due to its waterproof and mold-resistant properties.
How long does caulk take to cure?
Most caulks take 24-48 hours to cure fully, but always check the manufacturer’s instructions for specific curing times.
Can I use colored caulk for shower glass caulking?
Yes, many caulks come in various colors to match your bathroom’s design. Alternatively, you can use clear caulk for a neutral finish.
Conclusion: Mastering Shower Glass Caulking
Shower glass caulking is an essential maintenance task that ensures your bathroom remains watertight, clean, and visually appealing. By choosing the right type of caulk, preparing the surface thoroughly, and following proper application techniques, you can achieve professional results. Regular maintenance and inspections will keep your shower glass caulking in top condition, preventing costly repairs down the line. With this guide, you now have all the knowledge you need to handle shower glass caulking confidently and effectively.
Share this:
- Click to share on Facebook (Opens in new window) Facebook
- Click to share on X (Opens in new window) X
- Click to share on LinkedIn (Opens in new window) LinkedIn
- Click to share on Reddit (Opens in new window) Reddit
- Click to share on X (Opens in new window) X
- Click to share on Threads (Opens in new window) Threads
- Click to share on WhatsApp (Opens in new window) WhatsApp