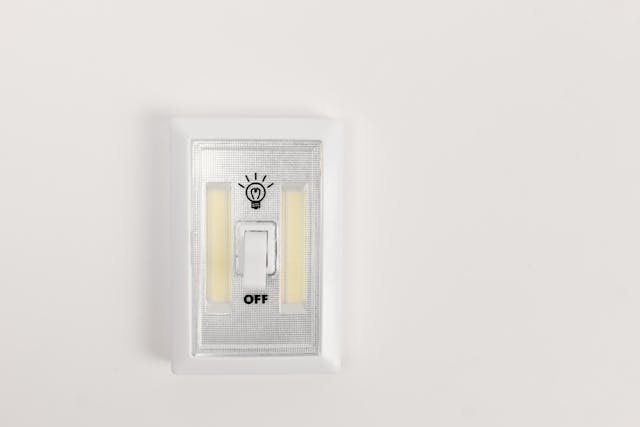
Switch mounts are essential components in electrical systems, and handling them carefully during maintenance or replacement is crucial. Improper handling can lead to damage, affecting both the mount’s performance and the connected electrical system. Learning how to open switch mount without damaging it requires a systematic approach, the right tools, and a clear understanding of safety protocols.
Whether you’re a DIY enthusiast or a professional electrician, knowing the correct techniques will save you time, money, and effort. This guide will provide step-by-step methods, safety tips, and expert advice to ensure you can handle switch mounts effectively without causing any harm. By the end of this article, you’ll have a comprehensive understanding of how to safely open a switch mount and maintain its integrity.
Understanding the Anatomy of a Switch Mount
To successfully open switch mount without damaging, it’s essential to understand its components:
- Faceplate: The visible part of the switch, which is usually screwed onto the mount.
- Switch Mechanism: The internal component that controls the electrical connection.
- Mounting Box: The structure housing the switch mechanism, fixed to the wall.
- Wiring Connections: Cables that connect the switch to the electrical circuit.
Understanding these components helps you approach the task with the necessary precision and care.
Preparing to Open a Switch Mount
Before you start, preparation is key to ensure a smooth process:
- Turn Off the Power: Always switch off the power supply at the circuit breaker to avoid electrical hazards.
- Gather the Right Tools: Use tools like a screwdriver, voltage tester, and pliers to ensure efficient and safe handling.
- Wear Safety Gear: Insulated gloves and goggles protect against accidental shocks and debris.
- Inspect the Area: Check for visible damage or signs of wear before proceeding.
Proper preparation minimizes risks and sets the foundation for a successful operation.
Using the Right Tools
Having the appropriate tools is critical for safely opening a switch mount:
- Screwdrivers: A flat-head or Phillips screwdriver is essential for removing screws.
- Voltage Tester: This tool ensures the circuit is de-energized before you start working.
- Plastic Pry Tool: A non-metallic tool helps in prying the faceplate without scratching or damaging it.
- Wire Cutters and Strippers: Useful for handling wiring connections, if necessary.
Using the right tools not only protects the switch mount but also ensures your safety.
Removing the Faceplate
The first step in opening a switch mount is to remove the faceplate carefully:
- Locate the Screws: Most faceplates are secured with screws located at the top and bottom.
- Unscrew Gently: Use a screwdriver to remove the screws without applying excessive force.
- Pry Off the Faceplate: If the faceplate is stuck, use a plastic pry tool to gently lift it off.
This process should be performed with care to avoid scratching or cracking the faceplate.
Accessing the Mounting Box
Once the faceplate is removed, you can access the mounting box:
- Inspect the Mounting Screws: These screws secure the switch mechanism to the box.
- Loosen the Screws: Turn the screws counterclockwise to release the mechanism.
- Pull Out the Switch Mechanism: Gently pull the switch mechanism out to expose the wiring.
Handle the switch mechanism with care to prevent damage to the internal components.
Handling Wiring Connections
When you open switch mount without damaging, wiring is a crucial aspect to handle carefully:
- Test for Voltage: Use a voltage tester to ensure there’s no live current in the wires.
- Disconnect Wires: If you need to remove the switch, disconnect the wires by loosening the terminal screws.
- Label the Wires: Use tape to label the wires for easy reinstallation.
Proper wiring management prevents errors and ensures the switch functions correctly after reassembly.
Cleaning and Maintenance
Regular maintenance keeps the switch mount in good condition and ensures smooth operation:
- Clean the Components: Use a dry cloth or brush to remove dust and debris from the switch and mounting box.
- Inspect for Damage: Check for signs of wear or corrosion and replace any damaged components.
- Lubricate Moving Parts: Apply a small amount of dielectric grease to improve functionality.
Maintenance enhances the longevity of the switch mount and prevents future issues.
Reassembling the Switch Mount
After completing your task, reassemble the switch mount carefully:
- Reconnect the Wires: Attach the wires back to their respective terminals, ensuring a secure connection.
- Secure the Switch Mechanism: Insert the switch mechanism into the mounting box and tighten the screws.
- Reattach the Faceplate: Place the faceplate back onto the switch and secure it with screws.
Ensure all components are properly aligned and secured for optimal performance.
Troubleshooting Common Issues
Sometimes, you may encounter challenges while opening or reassembling a switch mount:
- Stuck Screws: Use a lubricant or impact screwdriver to loosen stubborn screws.
- Damaged Components: Replace any broken parts to avoid operational issues.
- Misaligned Mechanism: Realign the switch mechanism carefully to fit properly in the mounting box.
Addressing these issues promptly ensures a successful outcome.
Seeking Professional Help
If you’re unsure about handling electrical components, it’s best to consult a professional:
- When to Call an Electrician: For complex wiring or damaged switch mounts, professional help is recommended.
- Choosing the Right Expert: Look for licensed electricians with experience in switch mount installations.
- Cost Considerations: Get quotes from multiple professionals to find the best service at a reasonable price.
Professional assistance guarantees safety and quality results.
Conclusion: Open Switch Mount Without Damaging
Opening a switch mount may seem daunting, but with the right approach, tools, and techniques, it’s entirely manageable. By following the step-by-step instructions outlined in this guide, you can confidently open switch mount without damaging it, ensuring safety and efficiency throughout the process.
Regular maintenance, careful handling of wiring, and the use of appropriate tools are key to preserving the integrity of your switch mount. Whether you’re conducting a simple inspection or replacing a faulty component, these practices will help you achieve professional-grade results.
Remember, safety is paramount when working with electrical components. If you’re ever in doubt, seek the assistance of a qualified electrician to avoid potential risks. With these tips, your switch mount will remain functional and reliable for years to come.

Share this:
- Click to share on Facebook (Opens in new window) Facebook
- Click to share on X (Opens in new window) X
- Click to share on LinkedIn (Opens in new window) LinkedIn
- Click to share on Reddit (Opens in new window) Reddit
- Click to share on X (Opens in new window) X
- Click to share on Threads (Opens in new window) Threads
- Click to share on WhatsApp (Opens in new window) WhatsApp


