A damaged floor can be both an eyesore and a safety hazard. Whether caused by wear and tear, accidents, or structural issues, a hole in your flooring requires immediate attention. Learning how to fix hole in the floor is a practical skill that will save you time and money while restoring your home’s appearance and safety.
This guide walks you through the entire process, from identifying the cause of the damage to implementing the right repair techniques for various flooring types. We’ll also discuss the tools you’ll need, preventive measures, and common pitfalls to avoid. By the end of this article, you’ll feel confident addressing floor damage of any size or complexity.
Whether you’re dealing with a small puncture or a larger structural issue, understanding how to fix hole in the floor is essential for maintaining a functional and aesthetically pleasing home. Let’s dive in to explore practical solutions that ensure lasting results.
Understanding Common Causes of Floor Damage
Damage to flooring can happen for various reasons. Here are the most common culprits:
- Heavy Traffic: Continuous foot traffic can weaken flooring materials over time.
- Moisture Exposure: Water damage is a leading cause of rot and structural issues in floors.
- Accidents: Dropping heavy objects can create cracks or holes.
- Insect Infestation: Termites and other pests can eat away at wooden floors.
- Aging Materials: Over time, even the most durable flooring materials can deteriorate.
Recognizing the cause of the damage is crucial to determining the right way to fix hole in the floor.
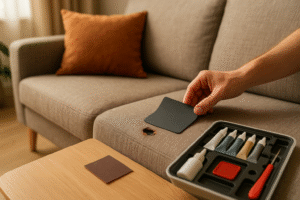
Preparing to Fix the Hole in Your Floor
Before beginning repairs, gather the necessary tools and materials:
- Patch Material: Wood, tile, or laminate, depending on your floor type.
- Adhesive or Nails: For securing the patch in place.
- Putty Knife: For smoothing the patch.
- Sandpaper: To create a seamless finish.
- Paint or Stain: For color matching the repair to the surrounding floor.
- Measuring Tape: To ensure the patch fits perfectly.
Preparation is key to a successful repair. Taking the time to gather your tools ensures a smooth process and a durable result.
Steps to Fix Hole in the Floor
Step 1: Assess the Damage
Begin by inspecting the hole. Is it a surface issue or a deeper structural problem? Understanding the extent of the damage helps you determine the best repair method.
Step 2: Clean the Area
Remove any debris or dirt from the hole and surrounding area. This ensures a clean surface for the patch to adhere to.
Step 3: Measure the Hole
Using a measuring tape, measure the dimensions of the hole. This ensures that your patch material will fit perfectly.
Step 4: Cut the Patch
Cut a piece of patch material slightly larger than the hole. This allows you to trim it down for a snug fit.
Step 5: Secure the Patch
Attach the patch using adhesive or nails. Press firmly to ensure it stays in place.
Step 6: Apply Filler
Use a putty knife to apply filler around the edges of the patch. This creates a smooth transition between the patch and the surrounding floor.
Step 7: Sand and Finish
Once the filler has dried, sand the area to create a seamless finish. Paint or stain the patch to match the rest of the floor.
Repairing Different Types of Floors
Different flooring materials require unique repair techniques. Here’s how to fix hole in the floor for common types of flooring:
Hardwood Floors
- Use a matching wood patch and secure it with wood glue.
- Sand and stain the area to blend the repair seamlessly.
Tile Floors
- Remove the damaged tile and replace it with a new one.
- Use grout to secure the tile and create a uniform look.
Laminate Floors
- Apply a laminate repair kit, which includes putty and a touch-up marker.
- Smooth the area with a putty knife and allow it to dry.
Concrete Floors
- Fill the hole with a concrete patch compound.
- Smooth the surface and allow it to cure before sanding and painting.
Common Mistakes to Avoid
When learning how to fix hole in the floor, avoid these common pitfalls:
- Skipping the Cleaning Step: A dirty surface can compromise the patch’s adhesion.
- Using the Wrong Materials: Ensure your patch material matches the existing flooring.
- Rushing the Process: Allow adequate drying time for adhesives and fillers.
- Ignoring Structural Issues: Address underlying problems to prevent recurring damage.
Avoiding these mistakes ensures a durable and professional-looking repair.
Preventing Future Damage
Once you’ve repaired the hole, take steps to prevent future issues:
- Regular Maintenance: Clean and inspect your floors regularly.
- Moisture Control: Use dehumidifiers to prevent water damage.
- Protective Pads: Place pads under heavy furniture to distribute weight evenly.
- Pest Control: Inspect for and eliminate pests like termites.
Prevention is a cost-effective way to extend the lifespan of your floors.
Alternative Methods for Fixing Holes
If traditional repair methods aren’t an option, consider these alternatives:
- Epoxy Filler: A durable option for concrete and hardwood floors.
- Overlay Panels: Cover the damaged area with a larger panel.
- Professional Help: Hire an expert for extensive damage or complex repairs.
Each method has its advantages, so choose the one that best fits your situation.
Frequently Asked Questions
How do I know if the floor hole is a structural issue?
Look for signs like sagging, uneven surfaces, or recurring damage. If in doubt, consult a professional.
Can I fix a large hole by myself?
While small holes are manageable for DIY repairs, larger holes may require professional assistance.
How long does it take to repair a floor hole?
The repair process typically takes a few hours, but drying and curing times may extend the timeline.
Conclusion: Achieving a Seamless Floor Repair
Learning how to fix hole in the floor is a valuable skill that enhances your home’s appearance and safety. By following the detailed steps outlined in this guide, you can confidently tackle floor damage and achieve professional results.
Remember, preparation and attention to detail are key to a successful repair. Take the time to clean, measure, and match materials to ensure a seamless finish. By addressing damage promptly and taking preventive measures, you can enjoy a durable and visually appealing floor for years to come.

Share this:
- Click to share on Facebook (Opens in new window) Facebook
- Click to share on X (Opens in new window) X
- Click to share on LinkedIn (Opens in new window) LinkedIn
- Click to share on Reddit (Opens in new window) Reddit
- Click to share on X (Opens in new window) X
- Click to share on Threads (Opens in new window) Threads
- Click to share on WhatsApp (Opens in new window) WhatsApp