
How to Check Oil Levels Easily: Essential Guide for Beginners
Table of Contents
Introduction
Knowing how to check oil levels is one of the simplest yet most important tasks any vehicle owner can learn. Your car’s engine depends on oil to lubricate moving parts, reduce friction, and prevent overheating. Without proper oil levels, your engine could suffer from reduced performance, unnecessary wear, or even permanent damage. By understanding how to check oil levels, you can spot issues early and extend the life of your vehicle significantly.
Many drivers assume that oil checks are only for professionals at service stations, but in reality, the process is straightforward and requires no special training. All you need is a clean rag, a little time, and the knowledge of where to locate the dipstick under the hood. Once you know how to check oil levels correctly, you can confidently monitor your engine’s health in just a few minutes. Regular checks not only prevent costly repairs but also give you peace of mind before long drives.
This guide will walk you through every detail of how to check oil levels, why it matters, what tools you’ll need, and a clear step-by-step process. Whether you drive a new car, an older model, or even manage multiple vehicles, knowing how to check oil levels ensures that your engine stays in top condition. Think of it as routine care—just like checking tire pressure or topping up windshield fluid. The difference is that oil directly impacts the engine’s life and performance.
By the end of this article, you’ll not only understand how to check oil levels, but you’ll also know how often it should be done, what to look for in terms of oil quality, and how to identify when it’s time for a professional oil change. Let’s begin with why this simple habit is so essential for your car’s long-term health.
Why Checking Oil Levels Matters
Understanding how to check oil levels is more than just a routine car care task—it’s a fundamental part of vehicle maintenance that protects your engine and saves you money in the long run. Oil serves as the lifeblood of your engine, keeping parts lubricated, minimizing friction, and preventing overheating. When oil levels are too low, critical components grind against each other, causing excessive wear and potential engine failure. On the other hand, having too much oil can create pressure issues, foam buildup, and reduced lubrication efficiency. By regularly practicing how to check oil levels, you ensure that your engine runs smoothly, efficiently, and safely.
One of the most significant reasons to learn how to check oil levels is to avoid costly repairs. A neglected engine can seize up if it runs without adequate oil, often resulting in damage that requires thousands of dollars in repairs or even complete engine replacement. Many of these problems are preventable if drivers take a few minutes every month to monitor their oil. This simple habit acts as an early warning system, alerting you to leaks, oil consumption issues, or contamination before they escalate into serious mechanical failures.
Another crucial factor is fuel efficiency. An engine with proper lubrication operates with less resistance, which translates into better gas mileage. By knowing how to check oil levels and keeping them within the recommended range, you help your car burn fuel more effectively. In today’s world, where fuel prices fluctuate constantly, this small act of maintenance can lead to meaningful savings over time. Beyond saving money, it also contributes to lowering your carbon footprint by ensuring your vehicle runs cleaner and more efficiently.
Safety is also a key consideration. If oil levels drop too low during a drive, your car may suddenly overheat or lose power, creating dangerous situations on highways or remote roads. Knowing how to check oil levels before starting a long trip reduces the risk of breakdowns and gives you confidence behind the wheel. For families or individuals who rely heavily on their vehicles for daily commutes, vacations, or business travel, this knowledge can be a true lifesaver.
Finally, regularly practicing how to check oil levels helps you understand your car better. You’ll begin to notice patterns, such as how quickly your car consumes oil, whether the oil looks darker than usual, or if unusual smells are present. These observations provide valuable insight into your vehicle’s health, enabling you to make informed decisions about servicing and maintenance. In short, by learning how to check oil levels, you empower yourself as a driver, reduce risks, and ensure your car remains reliable for years to come.
Tools and Preparation
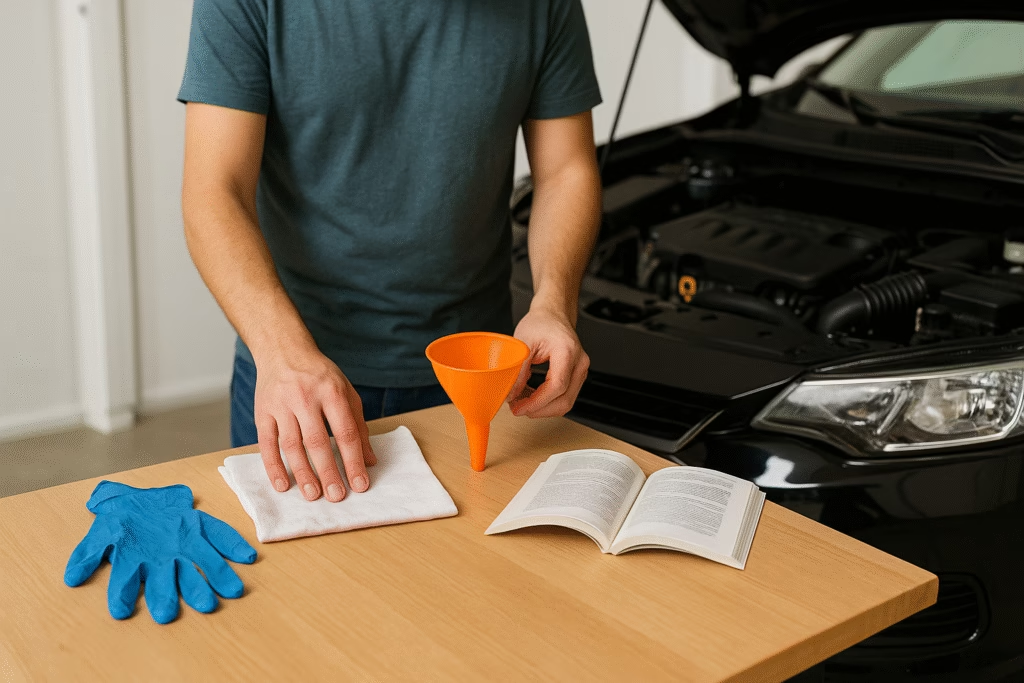
Before you dive into the process of how to check oil levels, it’s important to have the right tools and set up your environment properly. Luckily, this task doesn’t require expensive equipment—just a few basic items that most drivers already have at home or in their vehicle. By preparing ahead of time, you’ll make the process smoother, quicker, and more accurate. The better prepared you are, the more confidence you’ll have in ensuring your engine oil is at the correct level.
The first and most essential tool is a clean, lint-free rag or paper towel. When learning how to check oil levels, you’ll need to wipe the dipstick clean before reinserting it to get an accurate reading. Any residue or dirt on the rag can interfere with visibility, so it’s best to use a plain cloth without grease or patterns. Some drivers prefer microfiber cloths because they absorb oil well and leave a clear surface, making it easier to spot the oil line.
Next, you’ll need access to your vehicle’s owner’s manual. While this isn’t a physical tool, it’s an invaluable resource for understanding exactly how your specific car is designed. When figuring out how to check oil levels, the manual will tell you where the dipstick is located, whether your car should be on level ground, and if the engine should be warm or cold during the check. Since every vehicle has slightly different requirements, the manual eliminates guesswork and ensures accuracy.
You’ll also want to consider your working environment. Always park your car on a flat, level surface when practicing how to check oil levels. An uneven surface can tilt the oil pan and cause misleading readings, either making the oil appear too high or too low. Additionally, choose a safe location away from traffic, ideally in your driveway or garage, where you won’t be rushed. Safety should always be a priority when working around a vehicle’s engine bay.
Another important preparation step is allowing the engine to rest for a few minutes if you’ve recently driven. Oil circulates rapidly while the car is running, and stopping immediately may give you a false reading. Most experts recommend turning off the engine and waiting at least five minutes before performing how to check oil levels. This pause gives the oil enough time to settle back into the pan, resulting in a more reliable measurement.
Optional but useful tools include disposable gloves to keep your hands clean and a small flashlight for better visibility under the hood. Some drivers also keep a funnel nearby in case they need to top up oil immediately after checking. These extras aren’t required to understand how to check oil levels, but they make the process more convenient, especially if you plan to do it regularly.
By organizing these tools and preparing your car properly, you’ll set yourself up for success. A clean rag, a safe environment, and knowledge from your manual are the three essentials. With these in place, you’re ready to move on to the step-by-step guide, where you’ll put everything together and practice how to check oil levels with confidence.
Step-by-Step Guide: How to Check Oil Levels
Step 1: Locate the Dipstick and Prepare the Vehicle
The very first step in learning how to check oil levels is locating the dipstick in your vehicle. Most modern cars still have a dipstick for checking oil, though some newer models feature electronic oil monitors. If your car has a dipstick, it’s usually a brightly colored handle—often yellow or orange—positioned near the engine. Pulling out the dipstick gives you direct access to your oil measurement. If you’re unsure, consult your owner’s manual to identify its exact location. Understanding where to look is essential before you can truly master how to check oil levels.
Before pulling out the dipstick, make sure your car is parked on level ground with the engine turned off. If the engine has been running, wait five to ten minutes to allow the oil to settle into the pan. This small pause prevents inaccurate readings. As you approach the engine bay, take a moment to ensure the hood is secured properly with its prop rod or hydraulic strut. A safe and stable setup is just as important as knowing how to check oil levels.
Once you’ve located the dipstick, grab a clean, lint-free cloth or paper towel. Pull the dipstick all the way out and wipe it completely clean. This first reading doesn’t count—it’s only to remove any oil residue that may have splashed onto the stick during driving. After wiping, carefully reinsert the dipstick all the way back in, then pull it out again to check the actual oil level. This initial preparation step ensures you’re set up for the most accurate measurement when learning how to check oil levels.
At this stage, your main goal is to get familiar with the process. Some people find this step a little intimidating the first time, but after doing it once or twice, it becomes second nature. Locating the dipstick, wiping it down, and reinserting it may seem basic, but these are the foundation steps that allow you to get a true sense of your engine’s health. Remember, mastering how to check oil levels starts with careful preparation and correct handling of this critical tool.
Step 2: Reading the Oil Level Accurately
Now that you’ve prepared your vehicle and handled the dipstick correctly, the next step in mastering how to check oil levels is learning how to read the oil mark accurately. This is the critical moment where you determine whether your engine has enough lubrication to run safely. When you pull out the dipstick for the second time—after wiping and reinserting—you’ll notice oil coating the tip. Most dipsticks have etched markings, such as “MIN” and “MAX,” or two small holes, notches, or cross-hatched areas that indicate the safe range. Understanding these markers is the key to interpreting how to check oil levels effectively.
Hold the dipstick horizontally against your rag or paper towel to prevent dripping. Look closely at where the oil film stops. If the oil level falls between the minimum and maximum markers, your engine oil is in the acceptable range. Ideally, the line should be closer to the maximum, but never over it. If it’s below the minimum line, it means your engine is running with insufficient oil, which can lead to overheating and long-term damage. This is why knowing how to check oil levels regularly is so vital—it allows you to catch low oil before problems arise.
The appearance of the oil itself also tells you a lot about your engine’s health. Fresh, clean oil is usually amber or golden brown and somewhat transparent. As oil ages, it becomes darker, thicker, and less transparent. While slightly dark oil isn’t necessarily a problem, very thick, gritty, or sludgy oil suggests it’s time for an oil change. When practicing how to check oil levels, you’re not only measuring quantity but also assessing quality. If the oil smells burnt or looks contaminated, that’s a red flag that shouldn’t be ignored.
Temperature can also play a role in your reading. Some manufacturers recommend checking oil when the engine is warm, while others suggest doing it when it’s cool. Always follow your vehicle’s manual to ensure accuracy. Failing to do so may result in misleading readings. For example, oil expands slightly when hot, which could make your level appear higher than it actually is. The manufacturer’s guidelines eliminate this guesswork, ensuring you understand how to check oil levels correctly in your specific car.
Finally, once you’ve checked the level and examined the condition, wipe the dipstick clean again and reinsert it securely back into the tube. Leaving it loose could allow contaminants into the engine. This attention to detail closes the loop on the reading process. With practice, you’ll find that learning how to check oil levels isn’t just about numbers—it’s about reading subtle signs of your engine’s health and taking proactive steps to keep it running smoothly.
Step 3: Topping Up and Monitoring Over Time
After reading your dipstick and confirming your oil level, the final stage in mastering how to check oil levels is knowing what to do next. If your oil is within the recommended range, you can simply reinsert the dipstick, close the hood, and carry on with confidence. However, if the oil level is low, you’ll need to top it up. This step is just as important as the check itself because maintaining proper levels ensures your engine stays protected against wear, friction, and overheating. Practicing how to check oil levels and adjusting them when necessary forms a complete maintenance habit that benefits your car long-term.
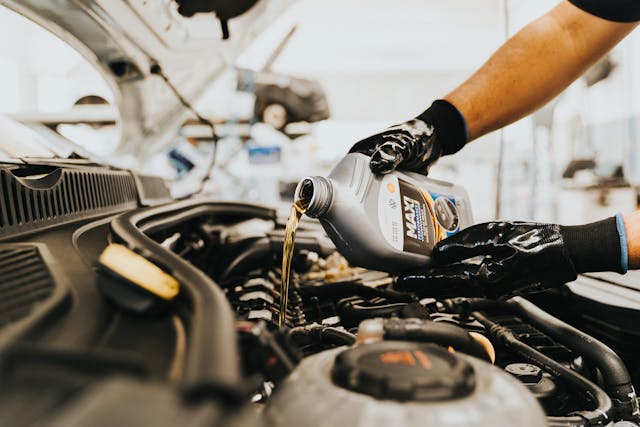
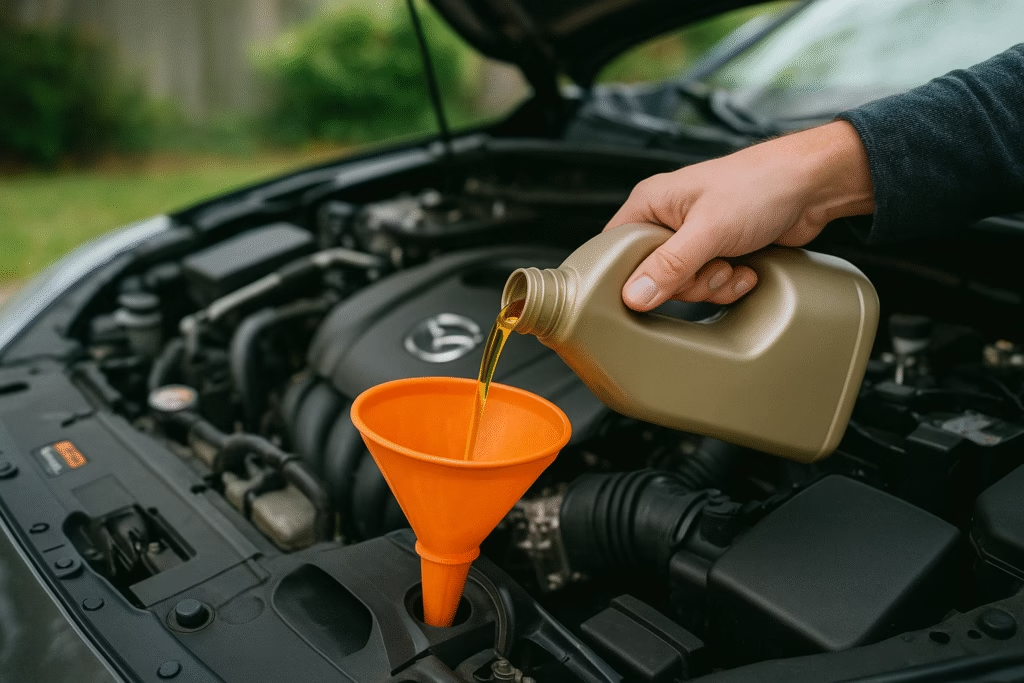
To top up, locate the oil filler cap, usually labeled with an oil can icon, near the top of the engine. Remove the cap and place a funnel inside to prevent spills. Slowly pour in the recommended oil type for your vehicle—this information is always listed in the owner’s manual. When learning how to check oil levels, it’s important to remember that less is more. Add small amounts at a time, then recheck the dipstick. Overfilling can cause just as many problems as running low, such as foaming or pressure issues inside the crankcase. The goal is to bring the level back to the safe zone, ideally near the maximum mark but never above it.
Once topped up, replace the oil cap securely and wipe away any spills. This ensures that no debris or dust sticks to the area, which could later find its way into the engine. Monitoring is the next critical piece of the puzzle. Knowing how to check oil levels isn’t just a one-time task—it’s something you should repeat regularly. Most experts recommend checking at least once a month, or more often if you drive long distances, tow heavy loads, or operate in extreme weather conditions. Consistency is key to spotting patterns such as oil consumption or leaks.
Beyond topping up, pay attention to the color and smell of your oil over time. If you notice rapid darkening, burnt odors, or milky discoloration, it may indicate problems like overheating or coolant mixing with the oil. These are issues that require a mechanic’s attention. Practicing how to check oil levels regularly helps you catch these signs early, potentially preventing catastrophic damage. If you find yourself adding oil frequently, it may signal a leak or excessive consumption that needs professional inspection.
By combining the act of topping up with consistent monitoring, you build a strong habit of preventative care. Knowing how to check oil levels means more than pulling out a dipstick—it’s about using that information to make informed decisions that keep your engine reliable. This routine takes only minutes but offers long-lasting benefits, from saving money on fuel and repairs to extending the life of your car. With this final step, you’ve mastered the complete cycle of checking, adjusting, and maintaining your engine’s vital lubrication system.
Conclusion
Learning how to check oil levels is one of the most valuable skills any car owner can develop. It’s a small, simple task that provides huge returns in terms of vehicle performance, safety, and cost savings. By now, you’ve seen how easy it is to gather a few tools, prepare your car, read the dipstick accurately, and take action when necessary. These steps take only minutes, yet they protect your engine from excessive wear, overheating, and potentially catastrophic damage. When drivers commit to practicing how to check oil levels regularly, they transform from passive owners into proactive caretakers of their vehicles.
The benefits of consistency cannot be overstated. Checking monthly, or even before long trips, gives you the reassurance that your car will perform as expected. If your dipstick shows that oil is low, topping up immediately prevents breakdowns and costly repair bills. If the oil appears dirty or smells burnt, you can schedule an oil change before it leads to bigger problems. In essence, knowing how to check oil levels empowers you to take control of your vehicle’s health, rather than waiting for a mechanic to diagnose avoidable issues.
This habit also helps you become more familiar with your car. Over time, you’ll learn how quickly your engine consumes oil, whether it tends to run darker between oil changes,
or if there are signs of leaks. These insights help you make informed decisions and spot irregularities early. Mastering how to check oil levels teaches you to read subtle signals, giving you peace of mind every time you drive. That level of awareness builds confidence, whether you’re commuting to work, taking a road trip, or driving in challenging conditions.
Remember that prevention is always less costly than repair. Something as basic as pulling a dipstick and reading the oil mark could save you thousands in engine repairs and extend your vehicle’s lifespan by years. For families, frequent travelers, or anyone who depends on their car daily, this practice is indispensable. By adopting how to check oil levels as part of your regular maintenance routine, you ensure that your vehicle remains reliable, efficient, and safe.
Ultimately, how to check oil levels is not just a mechanical procedure—it’s a mindset of responsibility and care. It reflects an investment in both your car and your safety on the road. Now that you understand the process, the tools, and the importance of routine monitoring, you’re equipped to maintain your engine’s health with confidence. Make this practice a habit, and your car will thank you with years of smooth, dependable service.


Pingback: How To Check Tire Pressure – Simple Guide For Safe Driving