
Introduction: Why Ceiling Water Damage Matters
Discovering ceiling water damage in your home can be alarming. Stains, peeling paint, or sagging drywall often indicate a hidden leak from plumbing, roofing, or HVAC systems. While some signs may seem minor at first, ignoring them can lead to serious structural problems, mold growth, and expensive repairs. That’s why it’s crucial to understand what ceiling water damage means, how to identify its source, and what steps you can take to address it quickly. Water intrusion in ceilings doesn’t just affect appearance—it weakens the integrity of your home. Constant moisture can warp wood framing, damage insulation, and compromise electrical wiring hidden above the ceiling. Beyond structural risks, moisture creates the perfect breeding ground for mold and mildew, which can harm indoor air quality and pose health concerns for your family. Acting fast not only prevents further damage but also keeps repair costs manageable. In this comprehensive guide, we’ll explain how to recognize the early signs of ceiling water damage, what tools you’ll need before starting repairs, and the step-by-step methods for addressing it effectively. We’ll also cover common mistakes to avoid, alternative repair methods, expert tips, and frequently asked questions. By the end, you’ll be equipped with the knowledge to handle both minor leaks and major ceiling issues confidently, protecting your home from ongoing damage.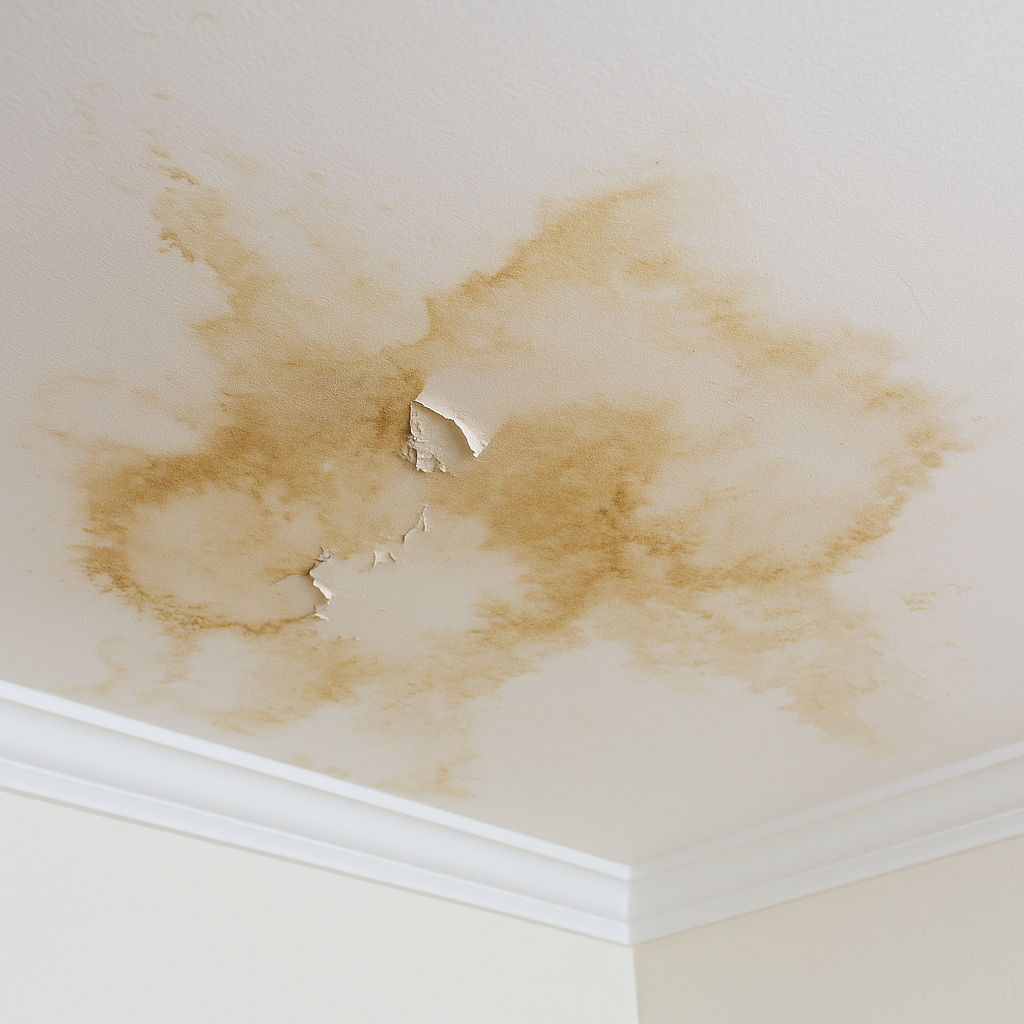
What You’ll Need Before You Start
Repairing ceiling water damage requires the right set of tools and materials to ensure safety and efficiency. Before starting, gather everything you’ll need so you don’t have to pause mid-repair. Having the right items not only speeds up the process but also ensures you can address both cosmetic and structural issues effectively. First, you’ll need protective gear. Safety goggles and gloves protect you from falling debris, mold spores, or sharp edges from damaged drywall. A dust mask is also recommended if you’ll be sanding or working around mold-contaminated areas. A sturdy ladder is essential for reaching the ceiling safely, especially in high or vaulted spaces. For the repair itself, basic tools include a utility knife, a drywall saw, and a putty knife. These allow you to cut away damaged sections of ceiling and prepare the area for patching. A measuring tape and pencil help ensure precise cuts when replacing drywall. To secure replacement sections, have drywall screws and a drill or screwdriver ready. In terms of materials, you’ll need replacement drywall sheets, joint compound, and drywall tape. For finishing, keep sandpaper, primer, and ceiling paint on hand to blend the repaired area with the rest of the surface. A bucket, sponge, and mild detergent are useful for cleaning stained areas before painting. If mold is present, use a specialized mold remover. Finally, have a tarp or drop cloth to protect furniture and floors from debris. With these tools and materials prepared, you’ll be ready to tackle ceiling water damage repairs safely and effectively.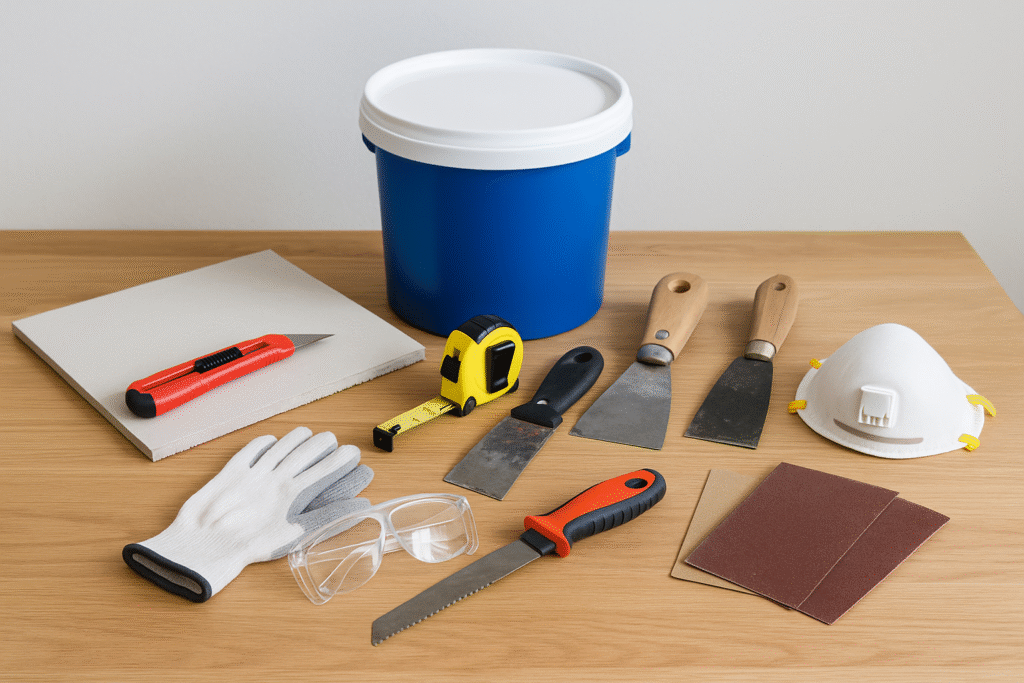
Step 1: Identify and Stop the Source of Water
The first step in repairing ceiling water damage is not fixing the ceiling itself—it’s finding and stopping the source of the leak. If you patch or paint over the damage without addressing the cause, the problem will return, often worse than before. Common sources include roof leaks, burst or leaking pipes, clogged gutters, and malfunctioning HVAC systems. Each requires a different solution, so careful inspection is critical. Begin by looking directly above the damaged ceiling area. In multi-story homes, check for leaking bathroom fixtures, toilets, or supply lines. In single-story homes, inspect the attic or crawlspace for signs of roof leaks, condensation, or dripping pipes. Look for wet insulation, dark wood stains, or active drips that may point to the problem. If the water damage appears after heavy rain, it’s likely a roofing or gutter issue. If it occurs randomly, plumbing may be to blame. Once you’ve identified the source, take immediate steps to stop further water intrusion. Shut off the water supply to leaking pipes, place buckets under drips, or cover roof leaks temporarily with tarps until professional repairs can be made. Acting quickly limits additional ceiling water damage and makes the repair process more manageable. Only after controlling the source should you move on to removing damaged material and restoring the ceiling.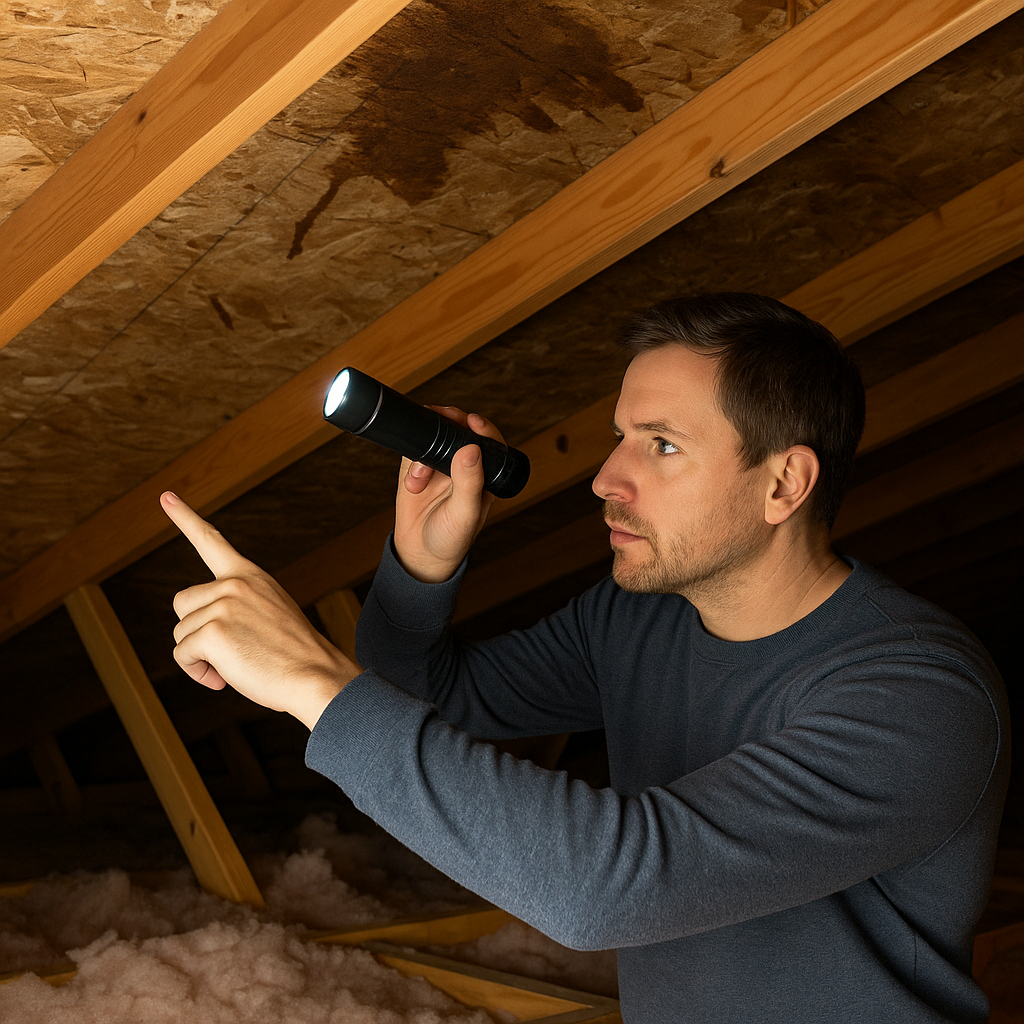
Step 2: Remove Damaged Materials
Once you’ve stopped the leak, the next step in repairing ceiling water damage is removing the compromised materials. Water-damaged drywall, insulation, and paint not only weaken your ceiling’s structure but also harbor mold and bacteria. Leaving these materials in place risks ongoing deterioration and unhealthy indoor air quality. Start by placing a tarp or drop cloth on the floor to catch falling debris. Using a utility knife or drywall saw, carefully cut out all visibly damaged drywall. Extend your cuts slightly beyond the stained or softened area to ensure you’re working with clean, dry material. If the drywall is sagging, support it as you cut to prevent it from collapsing uncontrollably. Next, check the insulation above the ceiling. Wet insulation loses effectiveness and must be replaced. Remove damp batts or blown-in insulation with gloved hands and dispose of them properly. While working, wear a dust mask or respirator to protect against inhaling mold spores or fiberglass particles. Once removed, allow the cavity to dry thoroughly before adding new insulation. Finally, scrape away any peeling paint or softened plaster around the cut-out area. The goal is to create a clean, solid edge where new materials can adhere properly. By removing all compromised components, you prevent future problems and prepare the surface for successful patching and restoration of ceiling water damage.
Step 3: Dry and Prepare the Area
After removing the compromised materials, the next crucial step in repairing ceiling water damage is drying the area completely. Trapped moisture can lead to recurring damage, mold growth, and even structural weakening. Proper drying ensures that your repair work will last and prevents further issues from developing behind the surface. Start by increasing airflow in the affected room. Open windows and doors if weather permits, and set up fans to circulate air directly at the damaged area. For more severe water damage, use a dehumidifier to pull moisture out of the air and speed up drying time. In cases where the ceiling cavity is exposed, point the fan or dehumidifier upward to ensure hidden insulation and framing also dry out properly. Monitor the area carefully during this process. Check the wood framing and drywall edges for dampness by touch or with a moisture meter if available. Depending on the extent of the damage, drying may take anywhere from 24 hours to several days. Be patient—repairing on a damp surface risks reoccurrence of ceiling water damage. Once the ceiling is dry, clean the surface with a mild detergent solution to remove any stains or mold spores. For stubborn mold patches, use a specialized cleaner designed for safe mold removal. Finally, sand the edges of the remaining drywall to create a smooth, even surface for attaching new materials. Proper preparation is the foundation of a seamless and long-lasting repair.
Step 4: Replace and Patch the Ceiling
Once the area is fully dry and prepped, the next step in repairing ceiling water damage is replacing the removed drywall and restoring the ceiling to its original condition. This step involves careful measurement, cutting, and patching to ensure the new section blends seamlessly with the existing surface. Begin by measuring the size of the hole you cut out earlier. Use these dimensions to cut a replacement piece of drywall that matches the thickness of the original ceiling. A snug fit is ideal, as it minimizes gaps and makes the patch easier to finish smoothly. If the damaged section was large, you may need to screw furring strips or wood cleats behind the edges of the hole to provide support for the new drywall piece. Secure the replacement drywall into place using drywall screws and a drill. Once attached, cover the seams with drywall tape to bridge the gap between the old and new sections. Apply joint compound over the tape with a putty knife, feathering the edges so the surface blends smoothly into the surrounding ceiling. Allow the first coat to dry, then sand it lightly before applying a second coat for a polished finish. By carefully replacing and patching the affected area, you eliminate visible signs of ceiling water damage and prepare the surface for painting. This step restores both the structural integrity and appearance of the ceiling, ensuring a clean, even base for the final stage of repair.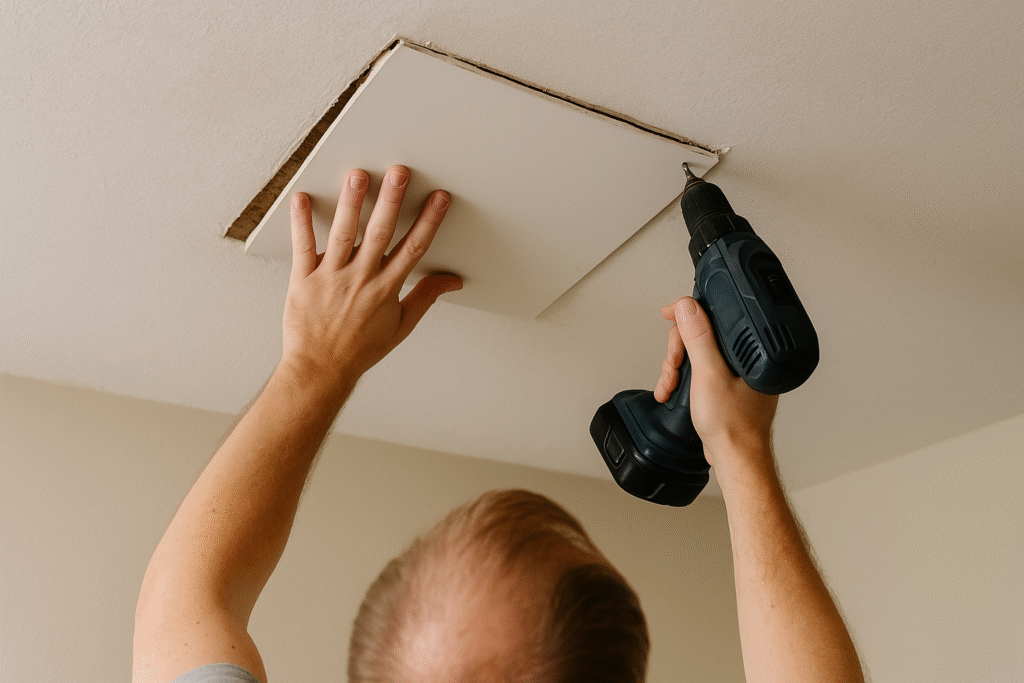
Step 5: Prime and Paint the Ceiling
The final stage in repairing ceiling water damage is priming and painting the patched area so it blends seamlessly with the rest of the ceiling. This step restores the room’s aesthetic appeal and ensures no stains bleed through the new finish. Start by applying a stain-blocking primer specifically designed for water damage. Standard primers often fail to cover deep stains, which can resurface through fresh paint. Using a roller or brush, apply the primer evenly over the patched drywall and slightly beyond the repair edges to create a consistent base. Allow the primer to dry fully according to the manufacturer’s instructions. Once dry, apply ceiling paint that matches the surrounding surface. For small patches, feather the paint outward to avoid visible transition lines. For larger repairs, consider repainting the entire ceiling for a uniform appearance. Use a roller for broad areas and a brush for tight edges or corners. Apply at least two coats, letting each dry completely before adding the next. After painting, inspect the ceiling under natural and artificial light. Look for inconsistencies in color or texture, and touch up as needed. By priming and painting carefully, you not only conceal all signs of ceiling water damage but also restore the room to a clean, polished look that enhances your home’s overall value and comfort.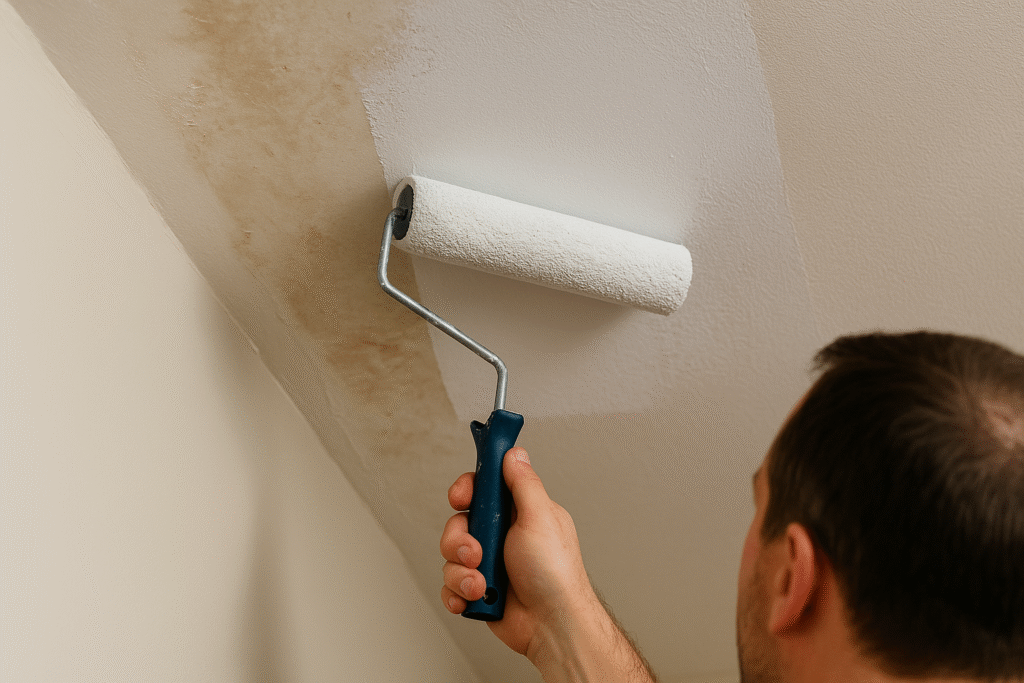
Common Mistakes to Avoid When Fixing Ceiling Water Damage
When repairing ceiling water damage, many homeowners unintentionally make mistakes that cause the problem to return or worsen. One of the most common missteps is failing to address the root cause of the leak. Simply patching or painting over the stains without fixing the underlying plumbing, roofing, or HVAC issue leads to repeated damage and wasted effort. Another frequent mistake is not removing all compromised materials. Leaving behind damp insulation, stained drywall, or softened plaster creates conditions for mold growth and structural weakening. Even if the ceiling looks “good enough” after a surface repair, hidden moisture can cause recurring issues that are far more expensive to fix later. Rushing the drying process is also a critical error. Some people attempt to patch and paint over a ceiling that hasn’t fully dried, which traps moisture inside and results in bubbling paint, peeling layers, and ongoing deterioration. Proper ventilation and the use of fans or dehumidifiers are essential for long-lasting repairs. Additionally, many homeowners use the wrong type of primer or paint. Regular paint cannot block water stains, leading to yellow or brown marks bleeding back through within weeks. Always use a stain-blocking primer before repainting. Finally, skipping protective gear such as gloves, goggles, and masks exposes you to mold spores and dust particles, creating unnecessary health risks. By avoiding these mistakes, you’ll ensure your repair of ceiling water damage is both safe and durable, saving you time, money, and stress in the long run.
Alternative Methods for Ceiling Water Damage Repair
While the standard process of removing, drying, and replacing damaged materials works well, there are alternative methods for addressing ceiling water damage that may be more suitable in certain situations. These methods can save time, reduce costs, or provide a temporary solution until full repairs can be completed. One alternative is using a ceiling repair patch kit. These kits include adhesive-backed mesh patches, joint compound, and finishing tools. They’re ideal for small holes or cracks caused by minor water damage, as they allow you to seal the surface quickly without cutting out large sections of drywall. However, this solution should only be used once the leak is fully resolved and the area is dry. For homeowners looking for a cosmetic-only fix, applying a stain-blocking primer and paint can temporarily conceal water stains. This option doesn’t address structural issues but can improve aesthetics if the damage is minimal and non-recurring. It’s best used as a stopgap measure when permanent repairs aren’t immediately possible. Another method is installing a ceiling panel or covering system. Drop ceilings, decorative tiles, or beadboard panels can hide unsightly damage while giving the room a refreshed appearance. This approach is often chosen in basements or utility rooms where aesthetics are secondary to function. It also makes future inspections and repairs easier by providing access to the area above. These alternative approaches won’t always replace the need for full repairs, but they can be practical options for certain situations. Whether temporary or cosmetic, each solution offers a way to manage ceiling water damage more flexibly based on your needs and budget.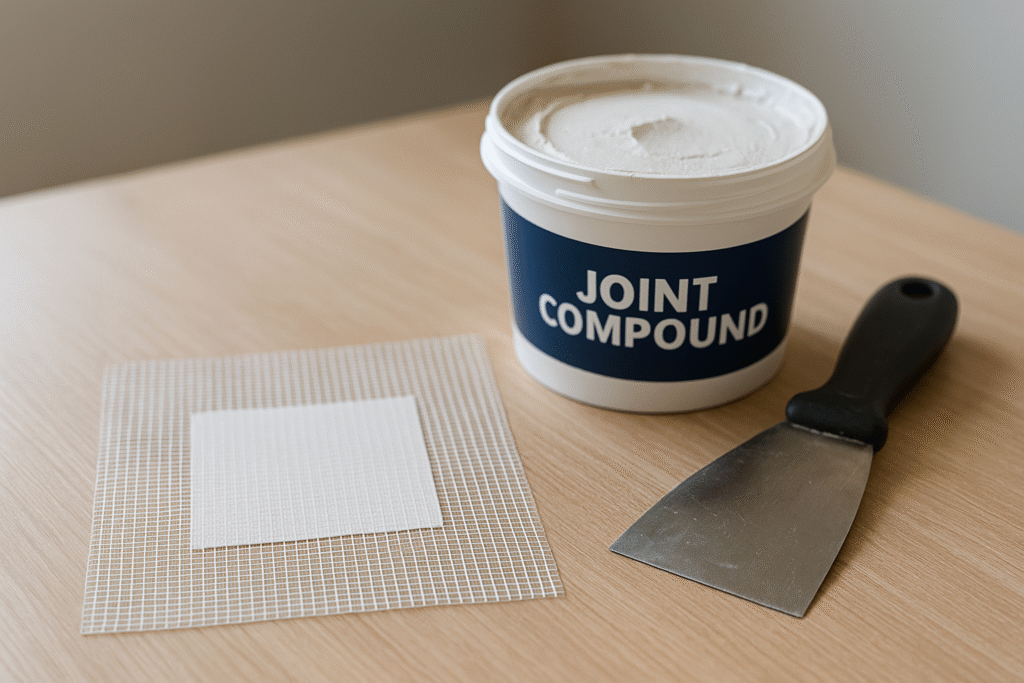
Expert Tips and Best Practices
When addressing ceiling water damage, following expert best practices can save time, money, and frustration. One of the most important steps is to act quickly. The longer water damage is left untreated, the more extensive the structural weakening and the higher the risk of mold growth. Professionals recommend beginning inspection and drying immediately after discovering damage. Another tip is to always confirm that the area is completely dry before moving on to repairs. Use moisture meters if available to ensure wood framing and drywall edges are no longer damp. Skipping this step often results in paint bubbling or mold regrowth behind the surface, undoing all your work. Experts also stress the value of high-quality materials. Using moisture-resistant drywall, also known as green board, is a smart choice for ceilings in bathrooms, kitchens, or other high-humidity areas. Pairing it with mold-resistant primer and paint provides an extra layer of protection against future ceiling water damage. Another best practice is ventilation. Improving airflow in the affected area with ceiling fans, attic vents, or dehumidifiers reduces the chance of future moisture buildup. This preventive measure helps protect your repairs long after they’re finished. Finally, never hesitate to call in a professional for major leaks or structural concerns. While DIY fixes are effective for small to moderate damage, extensive sagging or recurring leaks require expert evaluation. For further guidance, the EPA’s mold prevention resources offer valuable advice on keeping your home safe after water damage.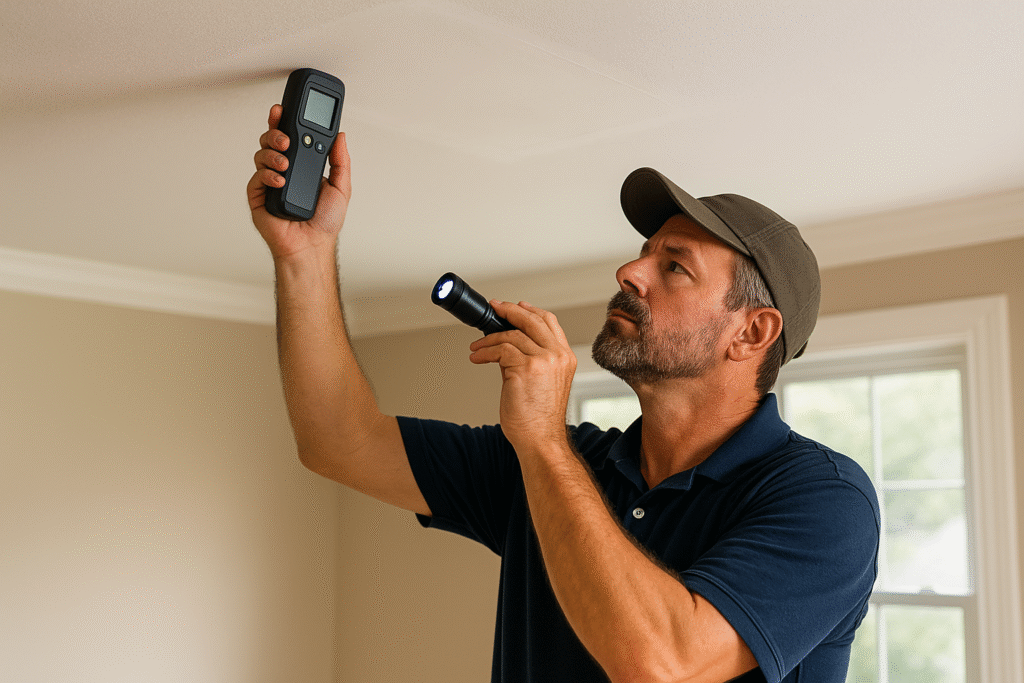
Frequently Asked Questions About Ceiling Water Damage
Homeowners dealing with ceiling water damage often have many questions about causes, repairs, and prevention. Here are answers to some of the most common ones.What causes ceiling water damage?
The most common causes include roof leaks, plumbing issues, clogged gutters, or faulty HVAC systems. Pinpointing the source is always the first step before making repairs.How do I know if the damage is serious?
Minor stains may only require cleaning and repainting, but sagging drywall, widespread stains, or mold growth indicate a more serious issue that may need professional help.Can I repair ceiling water damage myself?
Yes, small to moderate repairs are manageable with DIY skills, but larger structural damage or recurring leaks often require a contractor. Always prioritize safety and proper drying before patching.How long does it take for a ceiling to dry?
Depending on the extent of the leak and airflow, drying can take anywhere from 24 hours to several days. Using fans and dehumidifiers accelerates the process and ensures thorough drying.Where can I find more resources on safe cleanup?
For reliable information, visit the American Red Cross flood safety and cleanup guide, which includes water damage cleanup tips for homeowners.📌 Read Similar Topics
- Fix Moen Shower Valve
- Door Latch Not Fully Retracting
- How to Fix a Tear in Leather Shoes
- Unsticking a Zipper
- Fix Burn Hole on Couch
Conclusion: Putting It All Together
Repairing ceiling water damage may seem overwhelming at first, but with the right approach, it’s a manageable DIY task. The key is to act quickly—addressing the source of the leak, removing compromised materials, drying thoroughly, and repairing with care. By following the step-by-step guide, you not only restore your ceiling’s appearance but also protect your home’s structure and indoor air quality.
Throughout this guide, we’ve discussed the importance of identifying leaks early, preparing with the proper tools, and using effective repair techniques such as cutting out damaged drywall, replacing insulation, and priming with stain-blocking products. We’ve also covered common mistakes to avoid and alternative repair options for temporary or cosmetic fixes. Expert best practices and resources ensure that your repairs are safe, durable, and long-lasting.
The best part about tackling ceiling water damage yourself is the confidence and cost savings it brings. With patience and attention to detail, you can repair small to moderate issues without calling a contractor. For major or recurring leaks, don’t hesitate to consult professionals, but for most cases, these steps will help you achieve reliable results.
Ultimately, repairing water damage isn’t just about patching drywall—it’s about safeguarding your home against future problems. With these techniques and preventive measures in place, you’ll have peace of mind knowing your ceiling is secure, clean, and visually restored for years to come.


Pingback: Repressuring A Boiler With Safe Powerful DIY Steps
Pingback: How To Stop Faux Leather From Peeling With Smart Fixes