
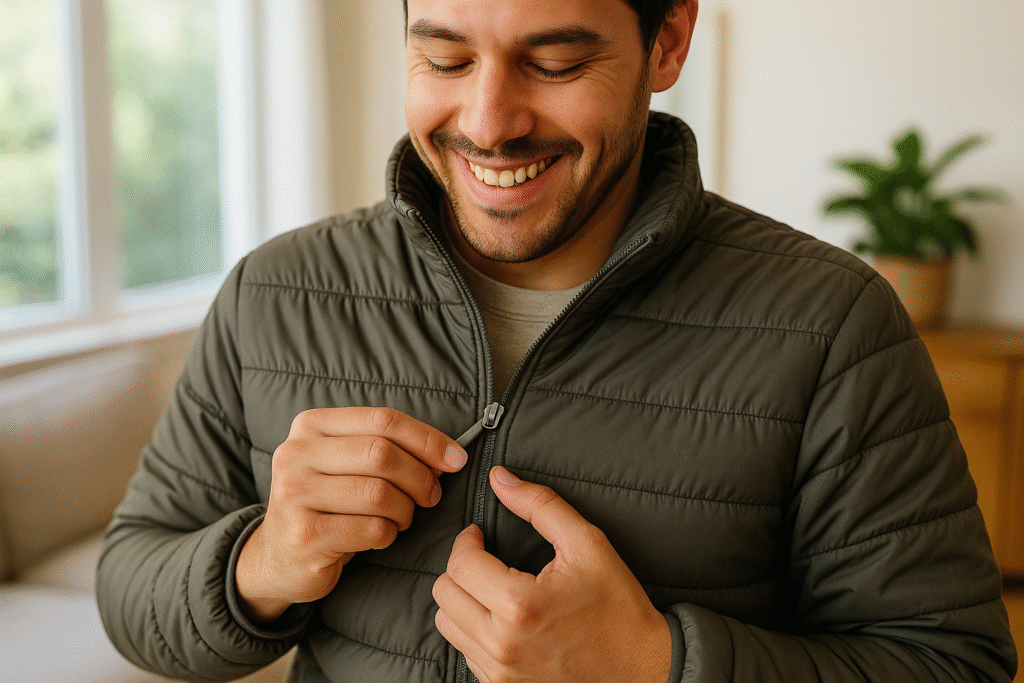
Introduction: Why Unsticking a Zipper Matters
Few things are more frustrating than getting dressed in a hurry only to discover that your zipper is stuck. Whether it’s on a favorite jacket, a reliable pair of jeans, or a well-used backpack, a jammed zipper can derail your plans and leave you feeling helpless. Learning how unsticking a zipper not only saves time and prevents wardrobe malfunctions but also extends the life of your clothing and accessories. Instead of discarding items prematurely, you can restore them to working order with simple techniques and tools.
The good news is that most stuck zippers are caused by minor issues—fabric caught in the teeth, dirt or debris buildup, or lack of lubrication. Once you understand what’s causing the problem, the solutions are surprisingly straightforward. Even better, the same tricks that work on clothing also apply to bags, boots, and other everyday items, making zipper repair a versatile skill. With a little patience and know-how, you can confidently get into unsticking a zipper in minutes without damaging the garment.
This guide walks you through the essentials: preparation, step-by-step repair methods, and expert tips to avoid common mistakes. You’ll also learn about alternative fixes, preventative measures, and professional options if DIY solutions aren’t enough. By the end, you’ll be equipped with practical knowledge to help with unsticking a zipper and keep your wardrobe functioning smoothly—saving money, reducing waste, and avoiding unnecessary stress.
What You’ll Need Before You Start
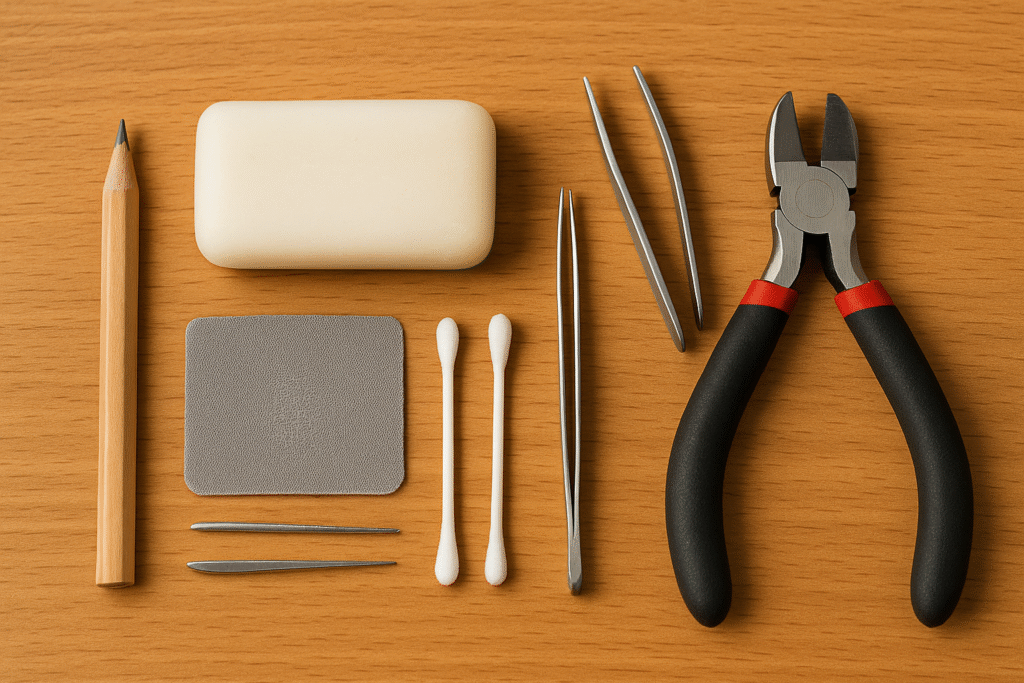
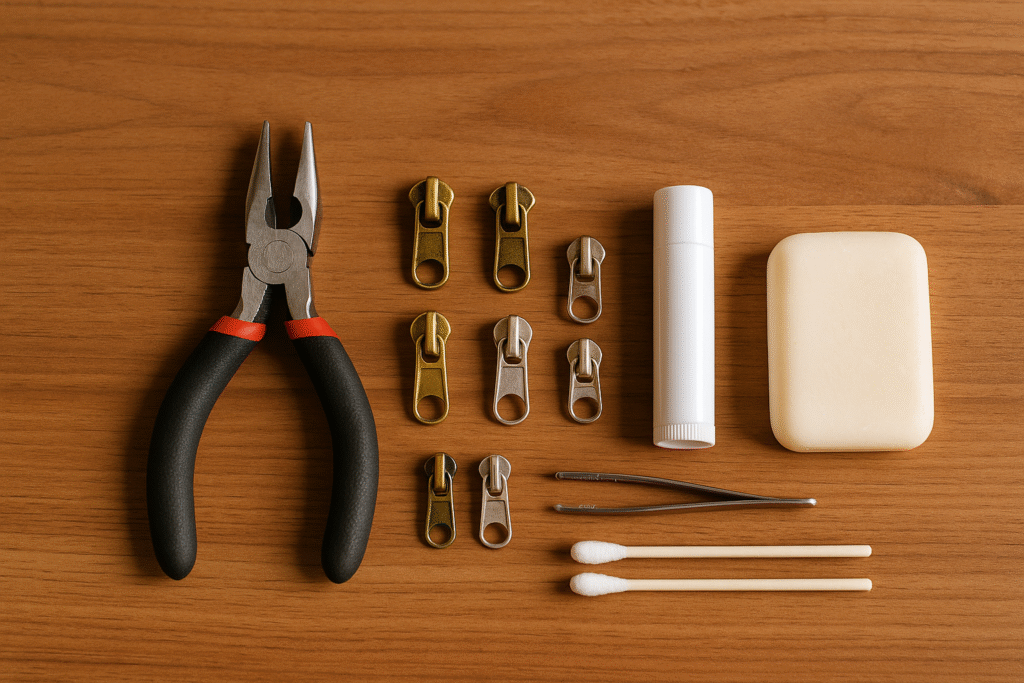
Before you begin trying to getting into unsticking a zipper, it’s essential to gather the right tools and materials. Having everything ready not only makes the process smoother but also prevents further damage to your clothing or accessories. Many zippers jam because of fabric caught in the teeth, dirt buildup, or lack of lubrication, and each of these issues requires specific solutions. By preparing properly, you’ll be able to address the cause efficiently and avoid making the problem worse.
One of the most important items you’ll need is a lubricant. Common household solutions include graphite pencils, bar soap, candle wax, or petroleum jelly. A simple swipe of these lubricants along the teeth can work wonders when you start unsticking a zipper. For more delicate fabrics, consider using a specialized zipper lubricant available at sewing and craft stores, as these are formulated to glide smoothly without staining.
Next, keep a pair of tweezers handy. They are invaluable for gently removing fabric or thread that may be caught between the teeth. Needle-nose pliers can also help if the zipper slider has become slightly bent or misaligned. A magnifying glass may sound excessive, but it can be useful for identifying tiny obstructions, especially on small zippers used in handbags or wallets.
You should also prepare a soft cloth or cotton swabs for applying lubricants carefully and wiping away any residue. For zippers that are dirty or grimy, a mild soap-and-water solution with a toothbrush can clean away debris before you attempt to unsticking a zipper. Finally, patience is just as important as tools—forcing the slider aggressively often makes the problem worse by breaking teeth or damaging the fabric. With these supplies gathered, you’ll be well equipped to handle most zipper problems without stress.
Step 1: Identify the Cause of the Stuck Zipper
The first step to successfully unsticking a zipper is to carefully identify what is causing it to jam. Many people instinctively tug harder on the slider when it won’t move, but forcing it often worsens the issue by bending the teeth, damaging the slider, or tearing the surrounding fabric. Instead, pause and examine the zipper closely. Look at both sides of the track and check whether fabric, thread, or lining is caught in the teeth. This is the most common reason zippers get stuck, especially on jackets, bags, and jeans.
If no fabric is visibly trapped, inspect the teeth themselves. Dirt, dust, or even corrosion on metal zippers can cause friction that prevents the slider from moving smoothly. Run your fingertip lightly along the teeth to feel for rough spots or irregularities. On plastic zippers, check for slightly bent or misaligned teeth that may be preventing the slider from gliding properly. Identifying whether the issue is obstruction, misalignment, or buildup will determine the best solution to unsticking a zipper.
Next, check the slider. Over time, the metal jaws inside a zipper slider can loosen, reducing the pressure they exert on the teeth. When this happens, the slider may catch or lock unpredictably. Gently wiggle the slider from side to side to see if it feels loose or misaligned. If the slider seems damaged, you may need to adjust it with pliers or replace it entirely.
Finally, assess the zipper’s environment. Sometimes moisture, sticky substances, or even excess detergent residue can cause zippers to seize. If the item was recently washed or exposed to rain, residue or rust may be the culprit. By taking the time to carefully evaluate the situation, you’ll know whether you need to remove trapped fabric, clean the teeth, or lubricate the track. This diagnostic step sets the stage for a smooth, effective repair and ensures you apply the right method to unsticking a zipper without making the problem worse.
Step 2: Gently Remove Obstructions and Free the Teeth
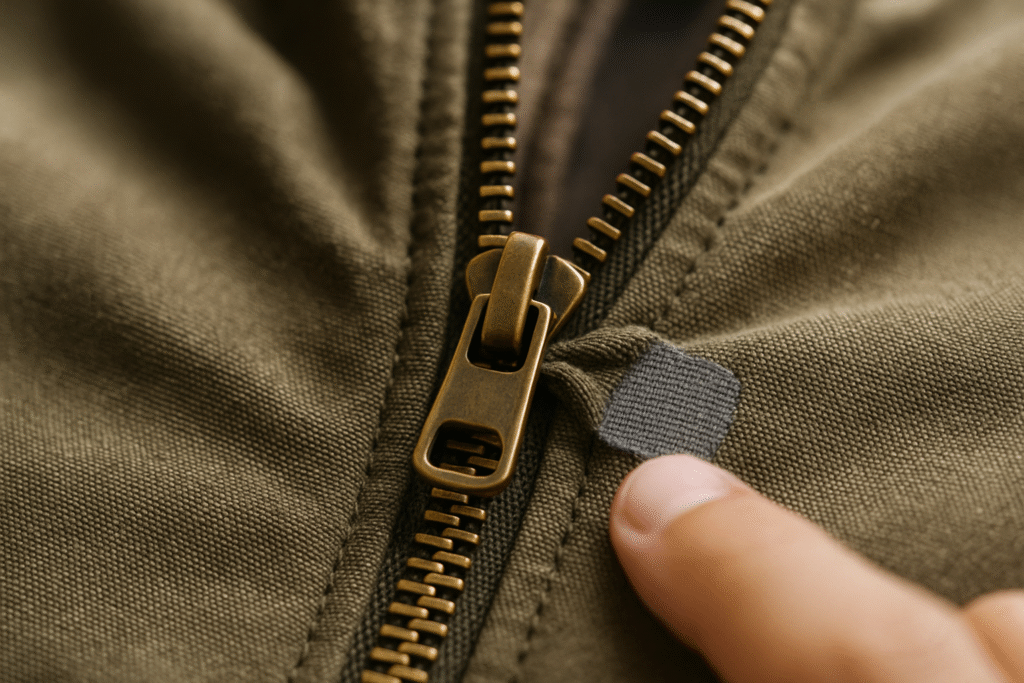
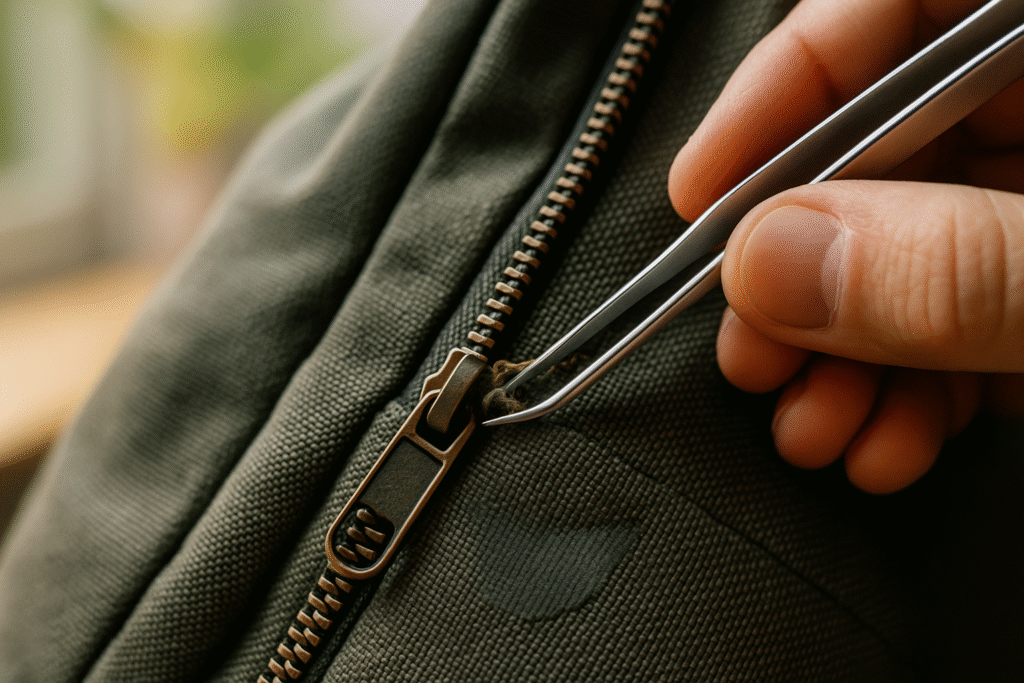
Once you’ve identified the cause of the jam, the next step to unsticking a zipper is removing any obstruction that may be caught between the teeth. Fabric and thread are the most common culprits, and they can be tricky to dislodge without making the problem worse. Start by holding the fabric firmly with one hand to prevent it from stretching further. Then, with your other hand, gently wiggle the zipper slider back and forth while pulling the trapped material free. Avoid yanking—patience and steady movements are the safest way to avoid tearing the garment.
If the fabric won’t budge, use tweezers to grip small threads or fibers caught in the teeth. This allows for precise handling without risking additional damage. In cases where the slider is stuck tightly, try easing it backward a few millimeters before attempting to move it forward again. This rocking motion often loosens the grip on the trapped fabric. For stubborn cases, slipping a thin safety pin or needle between the teeth can help push the material out. Once freed, double-check the zipper teeth to make sure nothing remains stuck before proceeding.
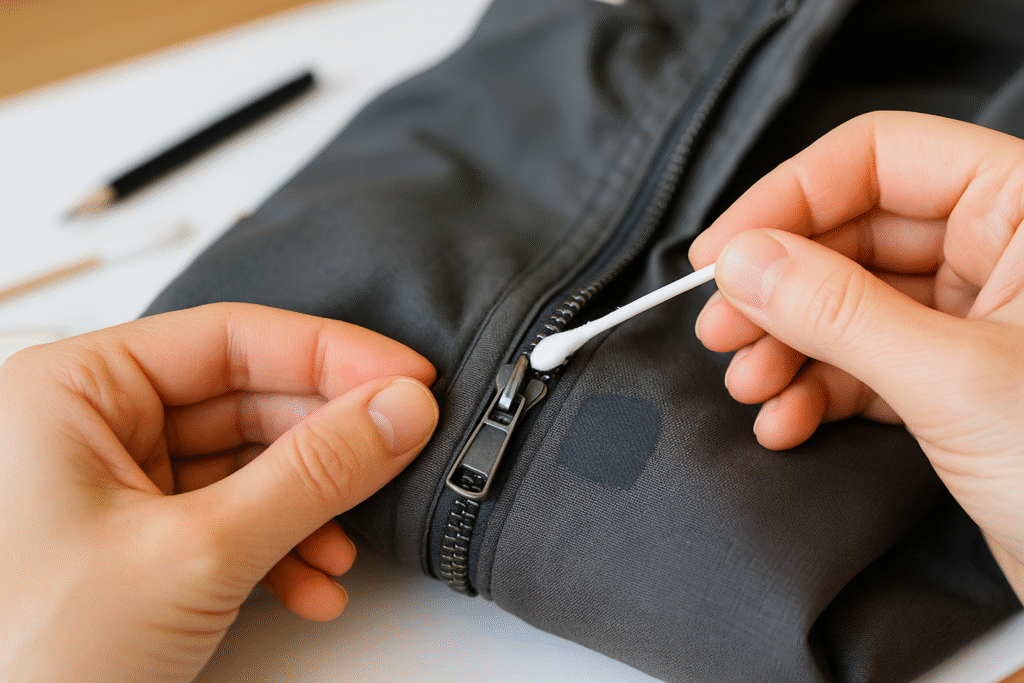
For dirt, grit, or sticky residues, start by cleaning the zipper. Dip a cotton swab in mild soapy water or rubbing alcohol and gently rub it along the teeth where the slider is jammed. This removes buildup and prepares the track for smoother movement. Allow the area to dry before testing the zipper again. If rust or corrosion is present on metal zippers, a light scrub with a soft toothbrush can restore functionality. Cleaning not only solves the immediate jam but also prevents future problems, making it an essential part of unsticking a zipper.
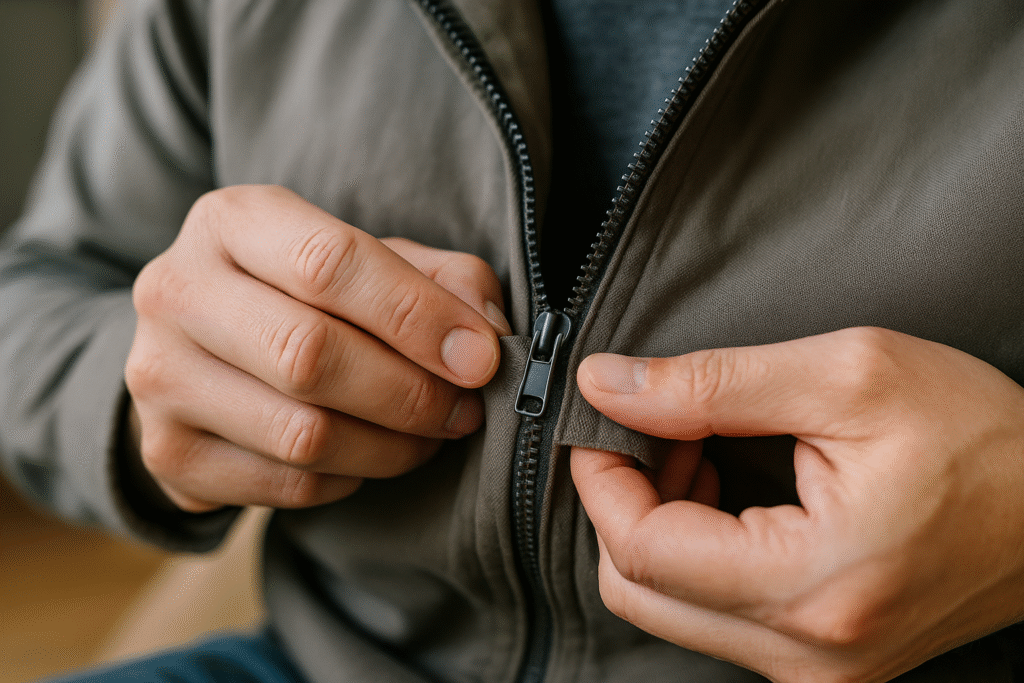
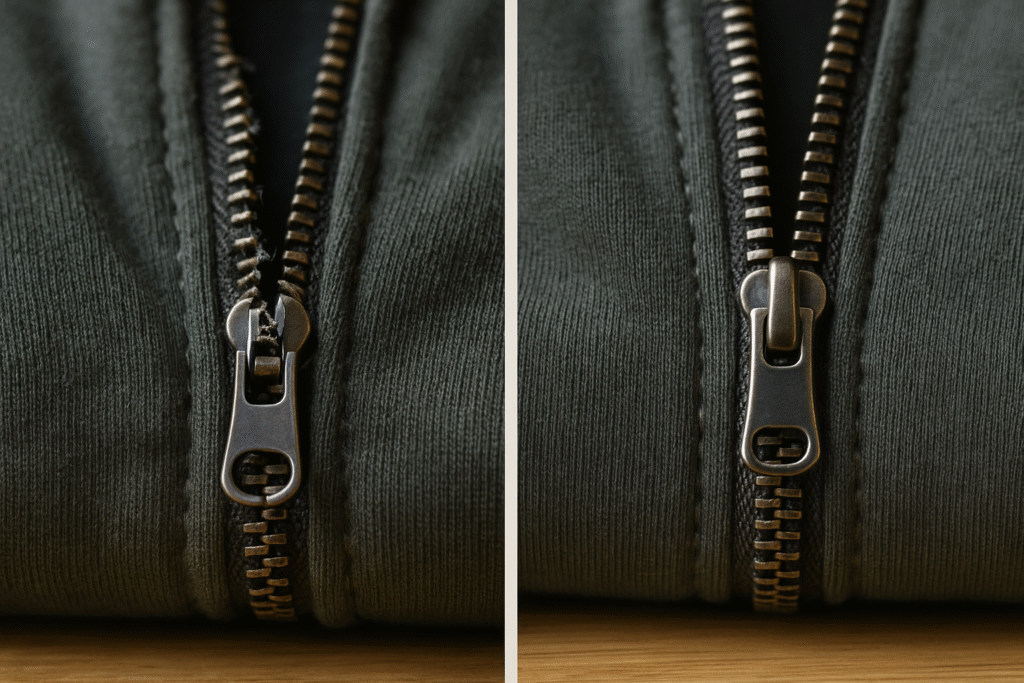
After the obstruction is cleared, test the zipper by slowly moving the slider up and down. It should glide more freely without resistance. If it still catches, double-check for hidden fibers or dirt you may have missed. By carefully freeing the teeth and clearing blockages, you’ll set the foundation for applying lubricants in the next step. This ensures that when you continue with unsticking a zipper, the slider moves smoothly and consistently across the track.
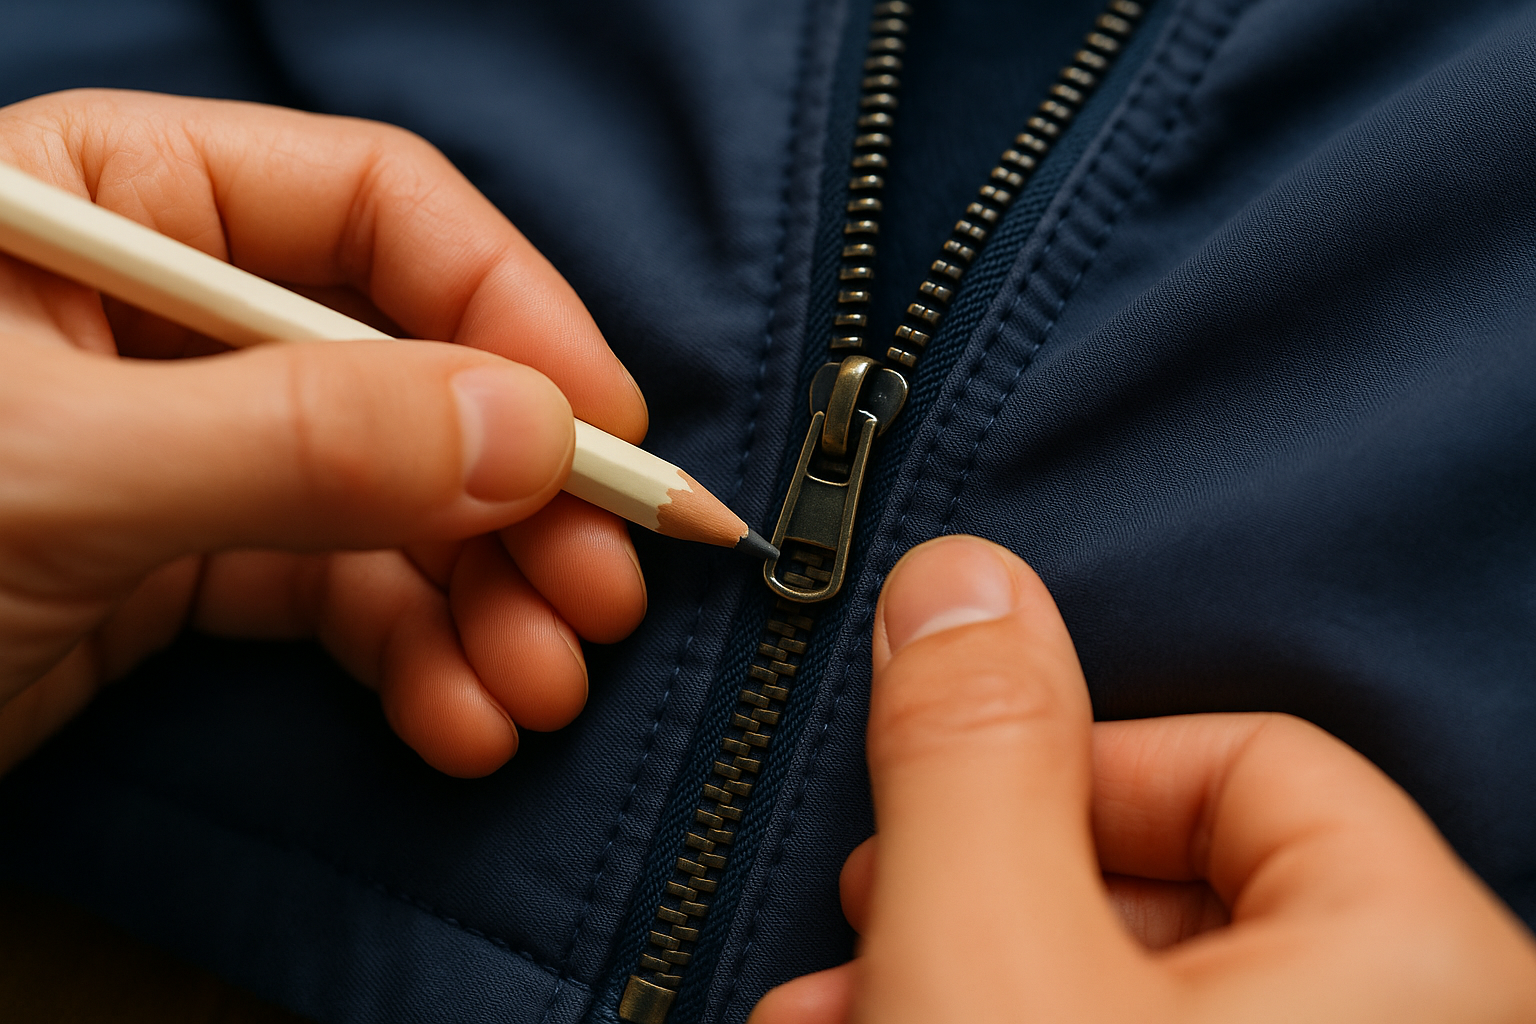
Step 3: Lubricate and Realign the Zipper
After clearing obstructions, the final step to unsticking a zipper is lubrication and realignment. A zipper slider needs to glide smoothly along the teeth, and friction is often the hidden reason it becomes stuck again even after the fabric is freed. Start by selecting a safe lubricant: a graphite pencil, candle wax, bar soap, lip balm, or a specialized zipper lubricant from a sewing store. For most fabrics, dry lubricants like graphite are the safest because they don’t stain. Simply rub the pencil tip along both sides of the zipper teeth where the slider moves, allowing fine graphite particles to coat the surface.
If you prefer wax or soap, gently rub it along the teeth in small amounts, ensuring you don’t overload the fabric with residue. Once applied, slowly run the slider back and forth several times to spread the lubricant evenly. This motion helps the product penetrate the gaps between the teeth, reducing resistance and restoring the smooth glide. Always test the area afterward with a soft cloth to remove any excess lubricant that could transfer to your clothing or belongings. This controlled application ensures that your attempt to unsticking a zipper doesn’t create new problems like staining.
Sometimes, the issue isn’t friction but misalignment. If you notice the teeth don’t mesh properly as you move the slider, gently pinch the sides of the slider with a pair of needle-nose pliers. Apply light pressure to tighten the slider’s grip on the teeth. Be cautious—squeezing too hard can break the slider, while too little pressure won’t correct the issue. Once adjusted, test the zipper again. Properly aligned teeth should lock together seamlessly without skipping or separating.
As a finishing step, give the zipper a few full runs up and down to confirm it’s working correctly. If the slider moves smoothly and the teeth interlock properly, your repair is complete. You’ve successfully learned how to unstick a zipper using a combination of cleaning, obstruction removal, lubrication, and realignment. With these techniques, you can save your clothing, bags, and accessories from early retirement and enjoy hassle-free use once again.

Common Mistakes to Avoid When You Unstick a Zipper
When trying to unstick a zipper, many people make simple but costly mistakes that either damage the zipper further or make the repair much harder. The most common error is pulling too hard on the slider. While it may be tempting to force it, doing so often bends the teeth, breaks the slider, or rips the surrounding fabric. Once the teeth are misaligned, fixing the zipper becomes significantly more difficult and sometimes impossible without replacement. Patience and gentle movements are far more effective than brute force.
Another mistake is using the wrong type of lubricant. Not all lubricants are safe for clothing or accessories. For example, greasy products like cooking oil or lotion can leave permanent stains or attract dirt, which leads to more sticking over time. Instead, stick to proven methods such as graphite pencils, candle wax, or specialized zipper lubricants. These provide smooth movement without damaging fabric. Skipping lubrication entirely is also a mistake, as friction is one of the primary causes of stuck zippers.
Neglecting to check for obstructions before applying force is another common problem. Threads, fabric, or dirt trapped in the teeth should always be removed before you attempt to move the slider. Applying lubrication or extra pressure while an obstruction remains can grind it deeper into the zipper, making it harder to remove later. Always inspect closely before proceeding.
Finally, people often ignore the slider itself. Over time, sliders loosen and fail to grip the teeth properly. Many DIY fixes focus only on the teeth and forget this critical component. Using pliers to gently tighten the slider is a simple but often overlooked solution. Skipping this step can result in a zipper that still sticks, even after cleaning and lubrication. By avoiding these mistakes—forcing the slider, using the wrong lubricants, overlooking obstructions, and ignoring slider adjustments—you’ll be far more successful in your attempt to unsticking a zipper without causing additional damage.
Alternative Methods for Unsticking a Zipper
While the standard approach to unstick a zipper involves removing obstructions, lubricating the teeth, and realigning the slider, there are alternative methods that can be equally effective depending on the material and severity of the jam. These methods are particularly useful if you don’t have common zipper repair tools on hand or if you’re looking for quick fixes while on the go. Exploring these options ensures you’re never left stranded with a stuck zipper, whether it’s on clothing, luggage, or outdoor gear.
One quick fix is to use everyday household items as lubricants. If you don’t have a graphite pencil or candle wax, try applying lip balm, bar soap, or even a small amount of hand sanitizer. Lip balm works especially well because it’s waxy enough to provide lubrication without soaking into the fabric. Hand sanitizer, thanks to its alcohol base, can break down sticky residues that may be holding the zipper in place. These improvisations are great when you need to unstick a zipper in a pinch.
Another alternative method is using heat. For plastic zippers that have stiffened or warped slightly, running a hair dryer on a low setting over the zipper can soften the material and make it more flexible. Once warm, try gently moving the slider back and forth. Be cautious, though—too much heat can damage the fabric or warp the zipper further, so this method should be used sparingly and only with controlled heat. For outdoor gear exposed to freezing conditions, warming the zipper with body heat or a warm cloth often works to loosen ice buildup.
In cases where the zipper slider itself is the issue, a temporary workaround is attaching a small keyring or paperclip to the pull tab. This gives you more leverage to gently maneuver the slider, especially on small or hard-to-grip zippers. While not a permanent fix, it can make unsticking a zipper much easier until you can apply a more lasting repair. If all else fails, sewing in a new zipper pull or replacing the slider entirely may be necessary, though this requires basic sewing skills or professional help.
Finally, if you rely heavily on gear with zippers—such as hiking backpacks, tents, or travel luggage—consider carrying a small zipper repair kit. These kits usually include replacement sliders, lubricant, and small tools for on-the-go fixes. They’re lightweight, inexpensive, and can be lifesavers during trips. Knowing these alternative approaches ensures that even when conventional tools or methods aren’t available, you’ll still be able to unstick a zipper quickly and effectively.
Expert Tips and Best Practices
Mastering how to unstick a zipper goes beyond quick fixes—it’s about applying proven techniques that ensure long-lasting results. One of the most important expert tips is to always work slowly and patiently. Tugging too hard or skipping steps often causes permanent damage, while careful handling preserves both the zipper and the surrounding fabric. Professionals stress that proper diagnosis—whether it’s fabric caught in the teeth, dirt buildup, or a loose slider—must always come before applying any repair method.
Another best practice is to use the right lubricant sparingly. Too much wax, soap, or petroleum-based product can gum up the teeth instead of loosening them. Experts recommend applying a thin layer along both sides of the zipper teeth, then gently moving the slider back and forth to distribute it evenly. Wipe away any excess with a soft cloth to prevent stains. Specialized zipper lubricants available in sewing and outdoor stores are particularly effective because they’re designed to reduce friction without leaving residue.
Proper maintenance also plays a key role. Regularly cleaning your zippers with a soft brush or cloth prevents dirt and grime from accumulating in the teeth. For metal zippers, occasional checks for rust or corrosion are essential, especially on outdoor gear like tents or jackets exposed to the elements. A light application of graphite or silicone spray can help protect the track and keep it moving smoothly over time. Consistent upkeep means you won’t have to repeatedly unstick a zipper when it jams unexpectedly.
Finally, experts recommend learning from reliable resources. The REI Expert Advice on zipper repair offers professional guidance on maintaining outdoor gear, while sewing and tailoring websites provide detailed tutorials for everyday garments. Referring to these trusted sources ensures you’re following tested methods rather than trial and error. By combining patience, the right materials, and preventative care, you can confidently unstick a zipper and keep your clothing and gear in excellent shape.
Frequently Asked Questions About Unsticking a Zipper
When learning how to unstick a zipper, many people encounter the same set of concerns. From whether household fixes are safe to how long repairs will last, these frequently asked questions cover the most common issues and provide practical solutions. Understanding these answers can help you troubleshoot more effectively and avoid unnecessary frustration.
Can I use household items to unstick a zipper?
Yes, many household products work well. Graphite pencils, candle wax, lip balm, or bar soap are reliable and safe options for most fabrics. Avoid greasy substances like cooking oil, which can stain and attract dirt. For outdoor gear, a dedicated zipper lubricant is ideal.
What if the zipper slider is loose?
If the slider feels loose or fails to grip the teeth properly, gently squeeze it with needle-nose pliers to restore its shape. Be careful not to over-tighten. If the slider is broken or bent beyond repair, you may need to replace it with a new one. This is often easier than replacing the entire zipper.
How can I prevent my zipper from getting stuck again?
Regular cleaning and occasional lubrication are key. Remove dirt or debris with a soft brush, and apply a small amount of graphite or zipper lubricant every few months. For jackets and outdoor gear, avoid storing items with zippers closed tightly under pressure, as this can strain the teeth over time. Proper maintenance reduces the need to repeatedly unstick a zipper.
Is it safe to use pliers on a stuck zipper?
Yes, but only when addressing a loose slider. Use light pressure and avoid forcing the teeth apart with pliers. Excessive force risks damaging the track permanently. For best practices, consult reliable repair guides such as Consumer Reports’ zipper repair advice, which compares safe methods and tools.
What if the zipper keeps splitting after being unstuck?
This usually indicates a worn or damaged slider. Even if the teeth appear intact, a stretched slider won’t hold them together. Replacing the slider often solves the issue, and repair kits make this process simple. If the zipper tape or teeth are damaged, however, professional replacement may be required.
 Read Similar Topics
- Unlock Efficiency: How to Unstick Stuck Shelf Easily
- Replace Dishwasher Soap Holder Effectively
- 10 Best Ways to Fix Ripped Sneaker Like a Pro
- The Essential Guide to Cleaning Pilot Light
- How to Remove a Towel Roll Holder
Conclusion: Putting It All Together
Learning how to unstick a zipper is a small but powerful skill that saves time, money, and frustration. From diagnosing the problem to carefully removing obstructions, applying lubricants, and realigning the slider, each step ensures that your zipper returns to smooth and reliable function. Along the way, you’ve also seen common mistakes to avoid, alternative fixes to try when traditional methods aren’t available, and expert advice to keep your zippers working for the long term. With this knowledge, a stuck zipper no longer needs to mean the end of a favorite jacket, backpack, or pair of jeans.
The most important takeaway is that patience and preparation matter. Forcing the slider is rarely the answer and usually makes the situation worse. Instead, gentle handling, the right tools, and consistent maintenance create results that last. Even household items like pencils, soap, or lip balm can become powerful tools in your effort to unstick a zipper. And when prevention becomes part of your routine—cleaning teeth, checking sliders, and applying light lubrication—you’ll avoid most zipper problems altogether.
By practicing these techniques, you gain confidence in handling one of the most common everyday clothing malfunctions. Rather than discarding items or spending money on replacements, you extend the life of your garments and gear while reducing waste. The next time a zipper jams, you’ll know exactly what to do, step by step. With these methods in hand, you can unstick a zipper quickly, effectively, and with the satisfaction of having solved the problem yourself. Your wardrobe—and your peace of mind—will thank you.


Pingback: Bathtub Baking Soda Hacks For Amazing Easy Cleaning
Pingback: Repressuring A Boiler With Safe Powerful DIY Steps
Pingback: Marble Scratch Repair With Simple Powerful Methods
Pingback: Fix Cigarette Burn In Headliner Fast With Proven Tricks
Pingback: How To Fix An Uneven Zipper Easily With Smart Hacks
Pingback: How To Fix A Scratched Wii Disc: An Ultimate Guide
Pingback: How Do You Make A Post Shareable On Facebook? (Simple Powerful Guide)