

Introduction: Why Fixing a Tear in Leather Shoes Matters
Leather shoes are a wardrobe staple—stylish, durable, and versatile enough to be worn for formal events, business meetings, or casual outings. But even the highest-quality leather isn’t immune to wear and tear. A small rip can appear from daily use, scuffing, or accidental damage, and if left untreated, that minor blemish can quickly grow into a serious problem. Learning how to fix a tear in leather shoes is not just about restoring their look; it’s about extending their lifespan, saving money, and preserving a favorite pair that might otherwise end up in the trash.
Ignoring a tear often leads to further splitting of the leather, exposure of the inner lining, and eventual structural failure of the shoe. Repairing the issue early ensures the damage doesn’t spread and helps maintain comfort, especially in areas where the shoe flexes during walking. What’s more, fixing leather properly keeps your footwear polished and professional-looking, which is crucial if the shoes are part of your work attire. Rather than replacing an expensive pair, you can often restore them with affordable tools and materials at home.
This guide is designed to walk you through everything you need to know: preparation, essential tools, step-by-step repair methods, common mistakes to avoid, and even expert tips. By the end, you’ll have the confidence and knowledge on how to fix a tear in leather shoes and make them look as good as new. With a little patience and the right approach, you’ll transform damage into durability while keeping your footwear investment intact.
How To Fix A Tear in Leather Shoes: What You’ll Need Before You Start
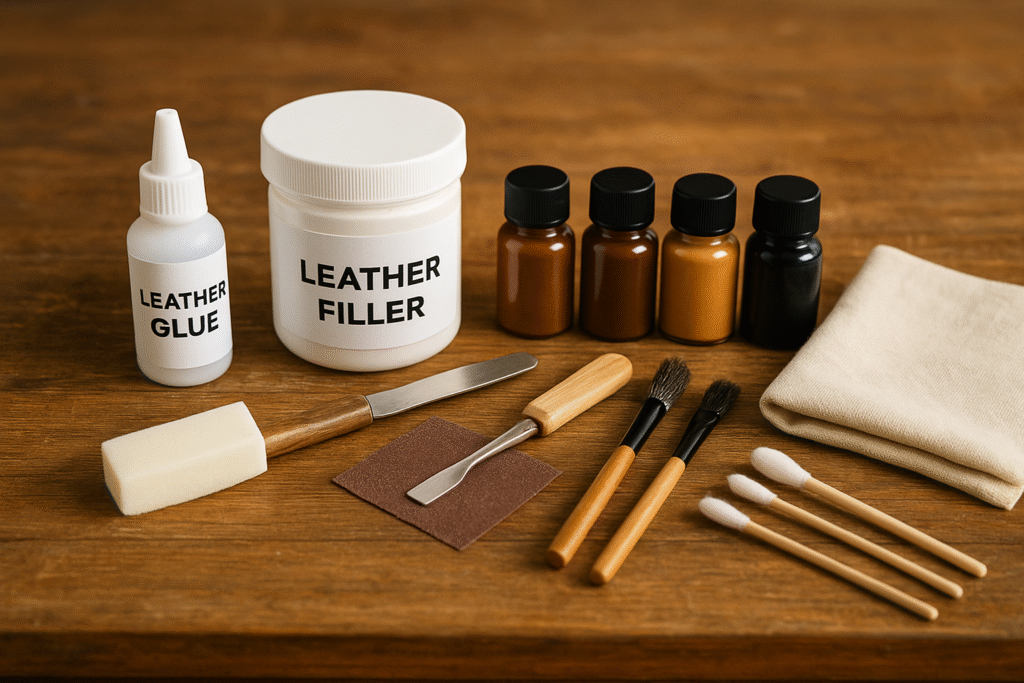
Before you begin the process on how to fix a tear in leather shoes, it’s essential to gather the right tools and materials. Leather repair requires precision and patience, and having everything prepared ahead of time ensures the repair will look seamless and last longer. Unlike fabric, leather doesn’t stretch back into shape once damaged, so the quality of your tools and products plays a crucial role in the success of the fix.
Start with the basics: a high-quality leather adhesive or flexible contact cement is necessary to bond the torn edges together without cracking when the shoe bends. For deeper tears, a leather filler compound will help restore the surface by filling gaps and smoothing out imperfections. A small spatula or palette knife is useful for applying filler evenly, while fine-grit sandpaper (600–1000 grit) helps smooth the repaired area once it has dried.
You’ll also need leather dye or color restorer that matches your shoe’s shade. This step is vital, because even a perfectly repaired tear can look obvious if the color isn’t blended properly. Many repair kits include a range of tints that can be mixed for a precise match. In addition, a soft cloth or sponge will help you apply the dye and buff the leather to restore its natural sheen.
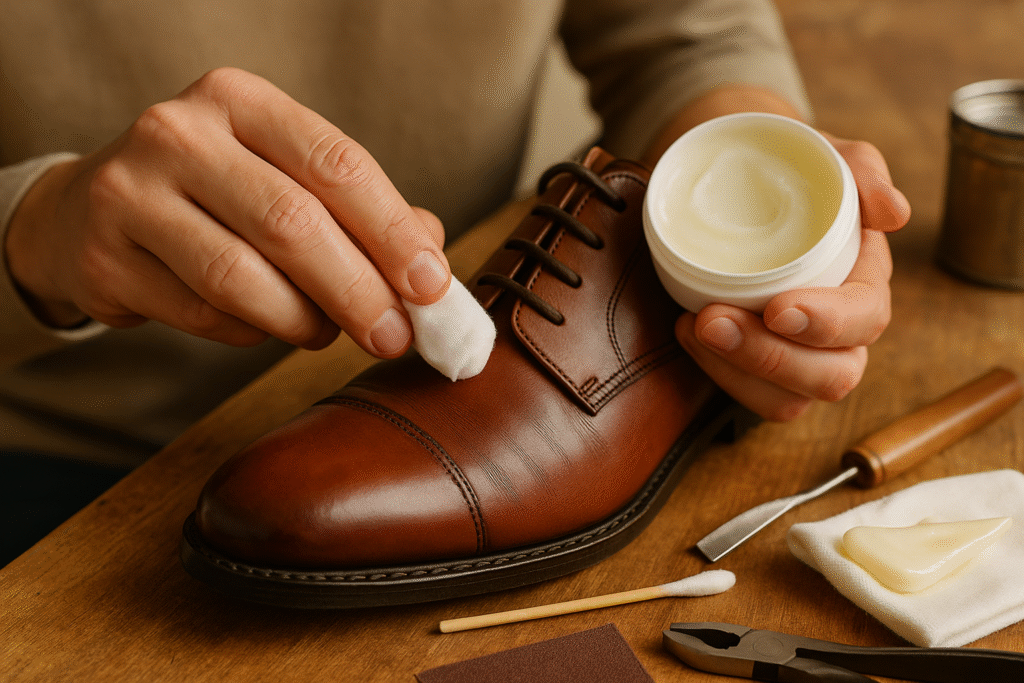
Other helpful items include masking tape to protect areas around the tear, cotton swabs for cleaning up excess adhesive, and a small brush for applying dye or conditioner. For cleaning, a mild leather cleaner or rubbing alcohol is important to remove dirt and oils before you attempt any repair. Finally, finish your kit with a leather conditioner to restore flexibility and keep the repaired area from drying out. With these tools assembled, you’ll be fully prepared to understand how to fix a tear in leather shoes and achieve results that look professional.
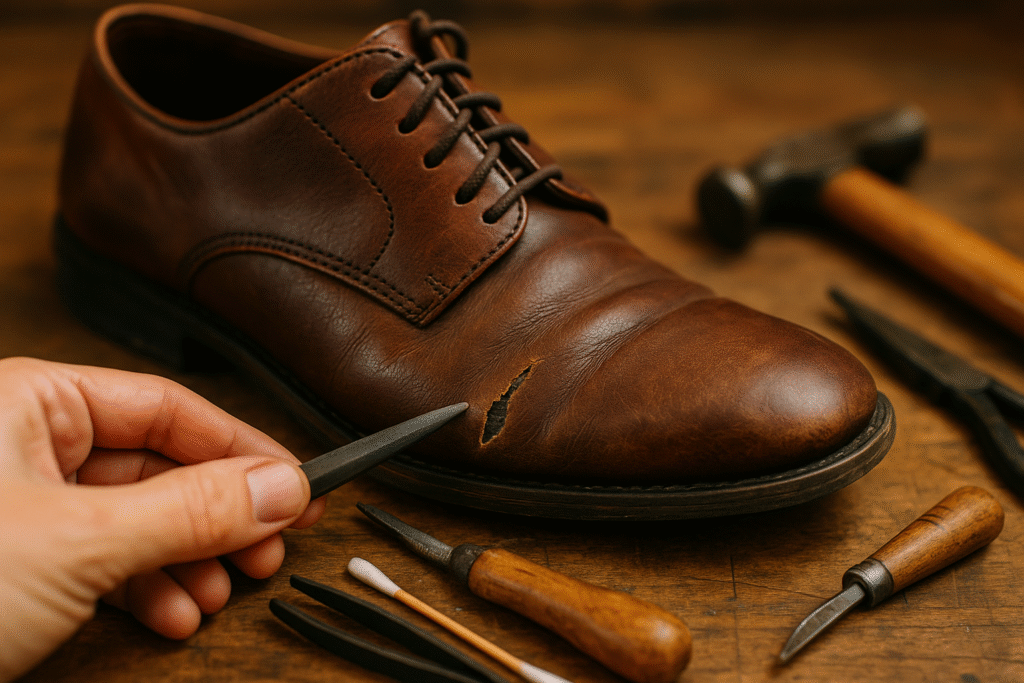
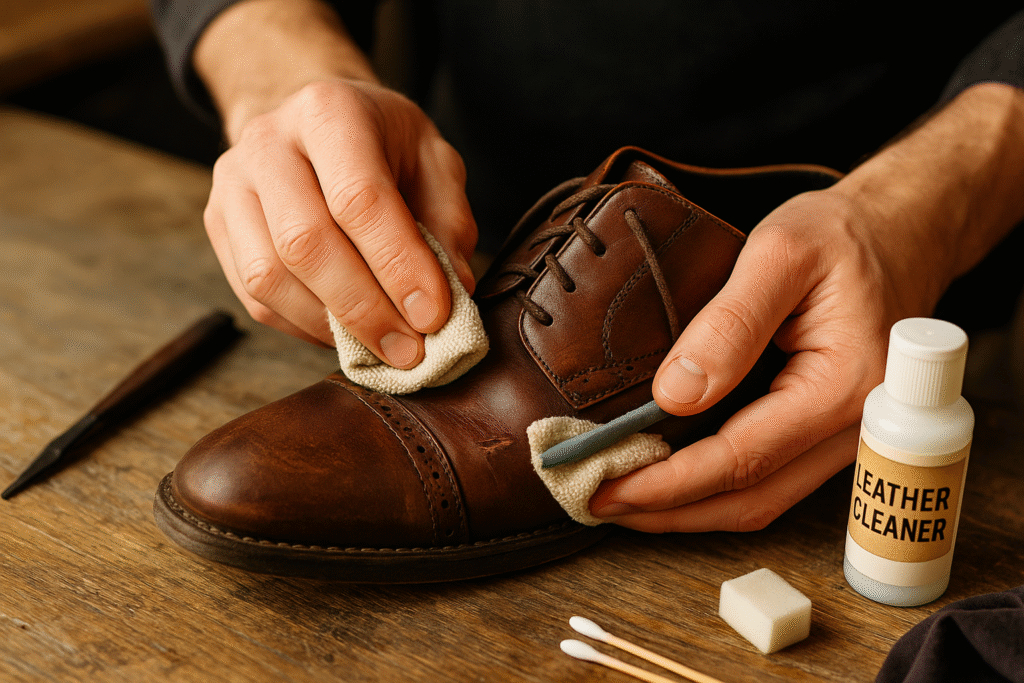
Step 1: Clean and Prepare the Damaged Area
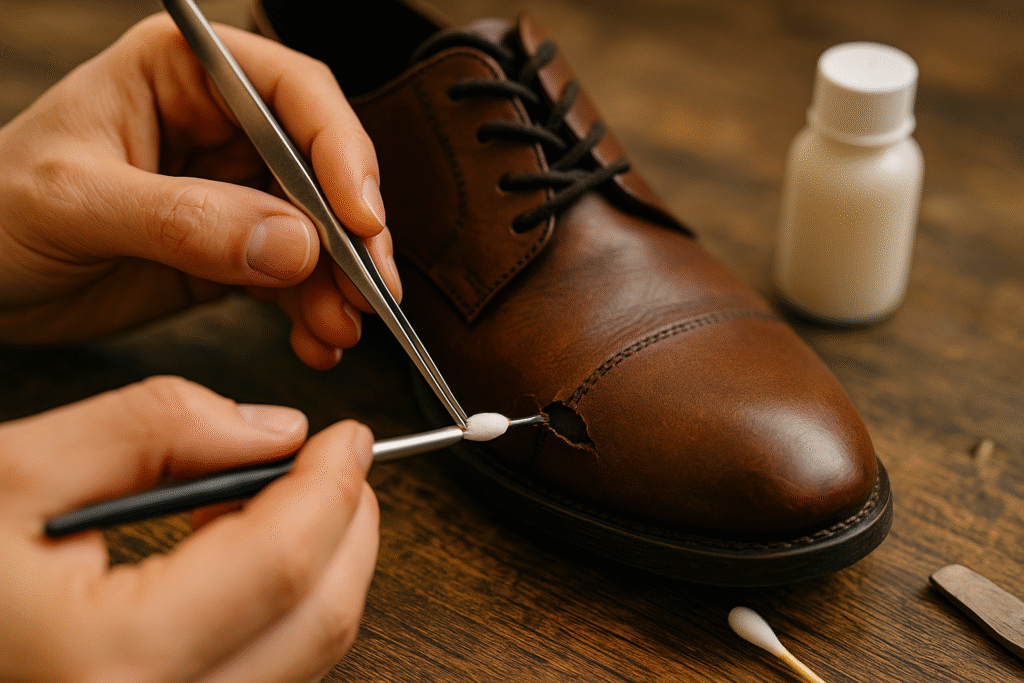
The first step to fix a tear in leather shoes is thorough preparation. Many people rush straight to gluing or patching, but without a clean surface, adhesives and fillers won’t bond effectively. Start by removing any dirt, dust, or polish from the shoe using a soft cloth dampened with a mild leather cleaner or rubbing alcohol. Focus on the area around the tear, wiping gently until the leather feels clean and free from oils. This cleaning process ensures that adhesives will stick properly and that the repair blends seamlessly with the rest of the shoe.
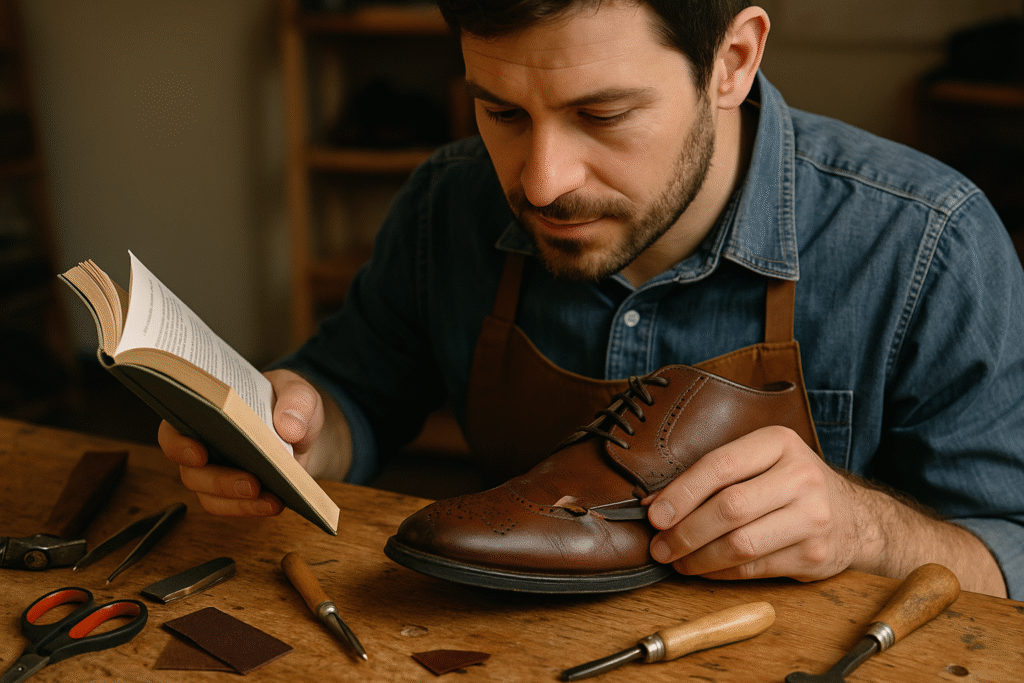
Next, inspect the tear closely. If there are loose fibers, jagged edges, or fraying, trim them carefully with small scissors. This prevents uneven bonding and helps the adhesive grip clean edges. For deeper tears, use a pair of tweezers to gently lift the edges so you can apply adhesive underneath. Take care not to enlarge the tear during this step. If the leather is dry or stiff, applying a small amount of conditioner beforehand can make the edges more flexible and easier to work with.
Once the area is cleaned and prepped, protect the surrounding leather with masking tape. This step keeps glue, filler, or dye from accidentally spreading to areas you don’t want to treat. For polished or glossy shoes, you may also want to lightly sand the inside edges of the tear with fine-grit sandpaper to create a surface that adhesive can grip more effectively. This small detail helps improve durability once you complete the repair.
By taking the time to clean and prepare the damaged area, you’re setting a solid foundation for the rest of the process. Skipping this stage often leads to weak repairs that peel or crack over time. Proper preparation ensures the products you use later will bond securely, giving your effort to fix a tear in leather shoes the professional finish you want.
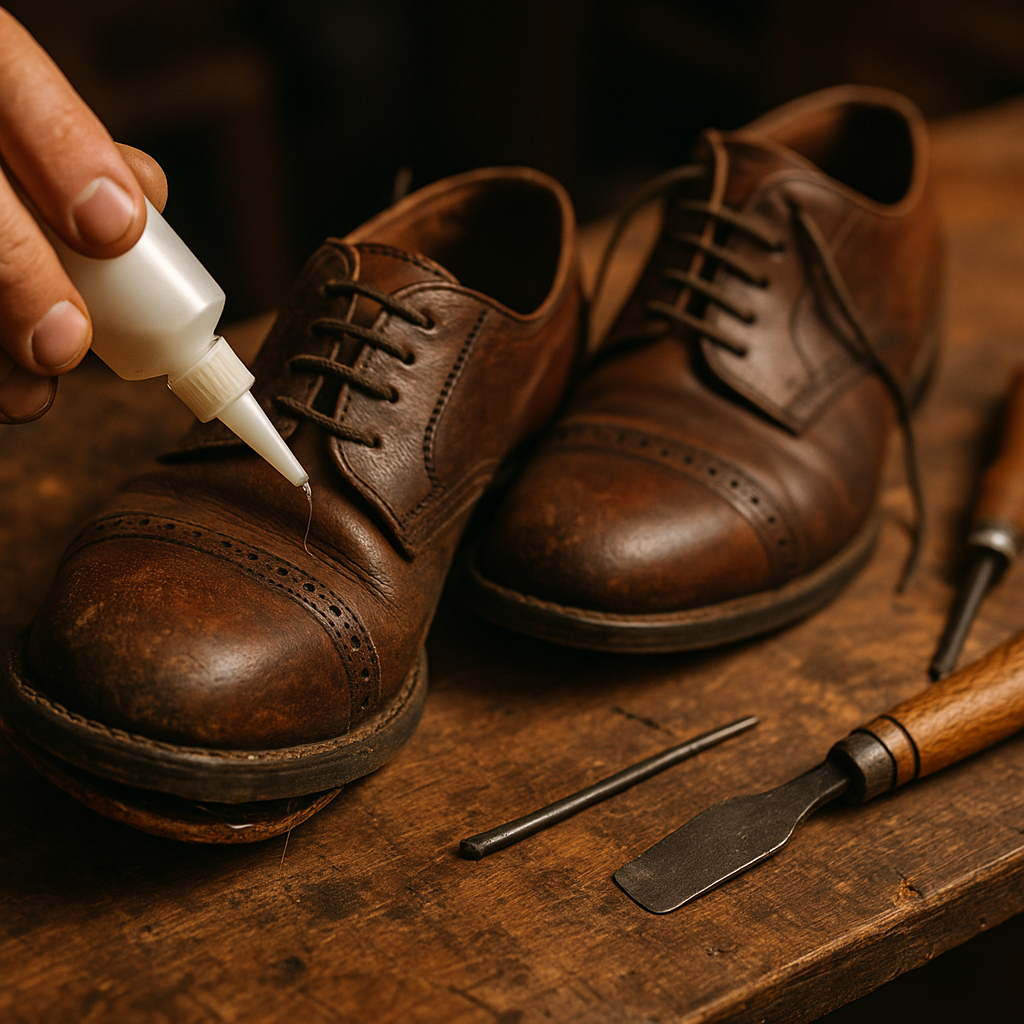
Step 2: Apply Adhesive and Bond the Tear
Once the damaged area is clean and prepped, it’s time to secure the torn leather. The goal here is to fix a tear in leather shoes by bonding the edges together in a way that is strong yet flexible enough to withstand daily wear. Begin by gently opening the tear with tweezers so you can apply adhesive inside. Use a high-quality leather glue or flexible contact cement, as these are designed to bend with the leather without cracking. Apply a thin layer of adhesive to both sides of the tear using a cotton swab or small brush, making sure not to oversaturate the material.
Carefully press the torn edges back together, aligning them as seamlessly as possible. Hold the leather in place for a few seconds to allow the adhesive to set. For larger tears, place a small piece of wax paper over the area and use a clamp or heavy object to apply even pressure while the glue dries. Be careful not to shift the leather during this step, as misalignment can make the repair obvious. Allow the adhesive to cure for the recommended time, usually between 30 minutes to several hours depending on the product.
After the glue has dried, gently test the bond by flexing the shoe. The repaired area should remain secure without gaps forming along the edges. If necessary, apply a second thin layer of adhesive on top of the seam for reinforcement. Wipe away any excess glue with a cloth before it hardens to avoid leaving shiny spots on the leather surface. Patience is key here—rushing this step may cause the bond to fail when the shoe bends during walking.
Proper bonding is the foundation of a successful repair. By carefully applying adhesive and aligning the edges, you ensure that your effort to fix a tear in leather shoes creates a strong and discreet repair. Once this stage is complete, you’ll be ready to move on to filling and smoothing the surface for a polished finish.
Step 3: Fill, Smooth, and Restore the Surface
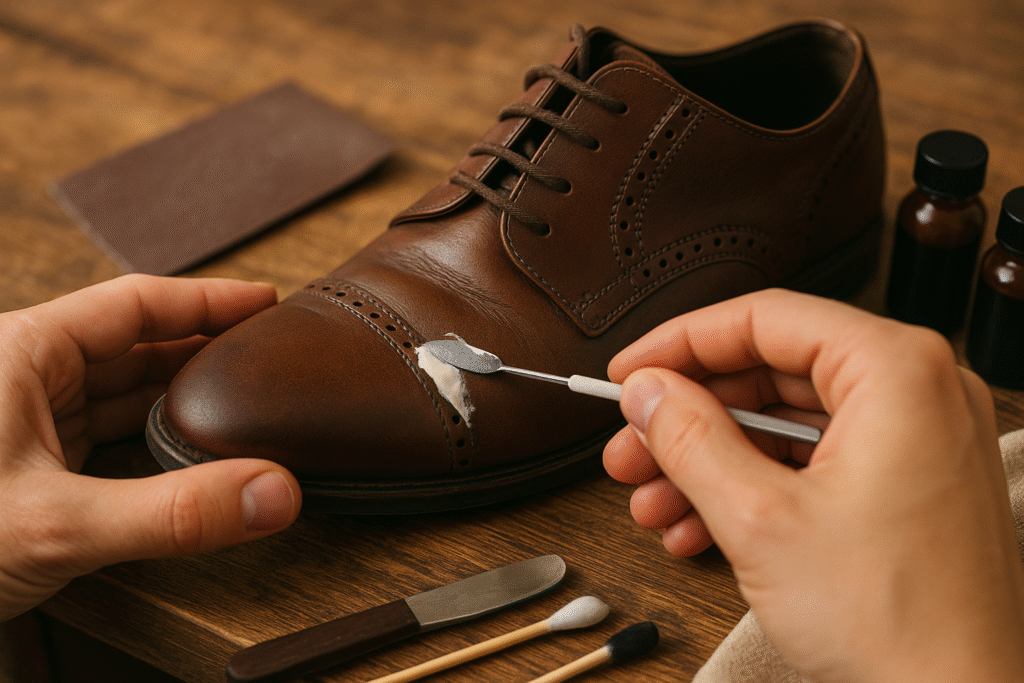
After bonding the torn edges with adhesive, the next step on how to fix a tear in leather shoes is restoring the surface so the repair blends naturally with the rest of the shoe. Even with precise gluing, small gaps or uneven seams may remain. That’s where leather filler comes in. Using a small spatula or palette knife, apply a thin layer of leather filler directly over the repaired tear. Spread it evenly to fill gaps and create a level surface. Avoid overfilling—multiple thin applications are better than one thick coat, as they dry more smoothly and are less likely to crack.
Allow the filler to dry completely according to the manufacturer’s instructions, usually 20–30 minutes per layer. Once dry, gently sand the area with fine-grit sandpaper (600–1000 grit). Sanding helps remove excess filler and creates a smooth finish that mimics the natural texture of leather. If the tear is deep, you may need to repeat the filler and sanding process two or three times until the surface looks uniform. Take your time during this step, because the smoother the finish, the less noticeable the repair will be.
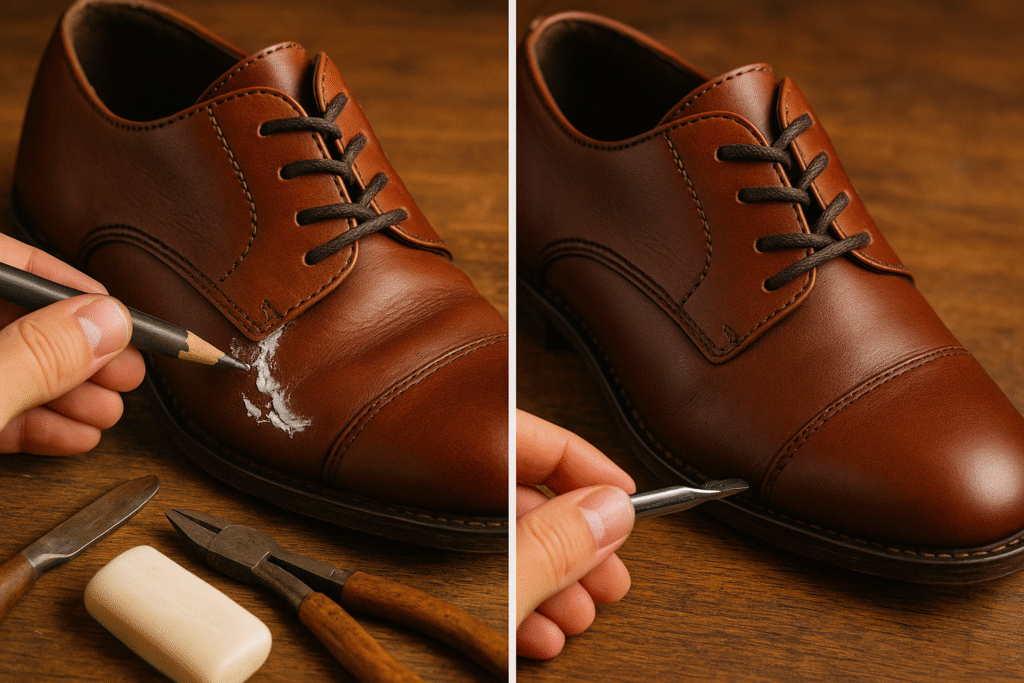
After smoothing, it’s time to restore the color. Use a leather dye or color restorer that matches your shoe’s shade. Apply the dye with a soft cloth, sponge, or small brush, starting with a light coat and building up gradually. Blend the edges carefully into the surrounding leather to avoid harsh lines. If needed, mix multiple tints to achieve an exact color match. Once the dye dries, lightly buff the area with a clean cloth to restore shine and make the repair blend seamlessly.
Finally, apply a thin layer of leather conditioner to the repaired area and the rest of the shoe. This step keeps the leather flexible and prevents the repair from drying out or cracking over time. By filling, smoothing, and recoloring the surface, you’ll complete the process to fix a tear in leather shoes in a way that is both durable and visually discreet. With proper care, the repair will last for many more miles of wear.
Common Mistakes to Avoid When You Fix a Tear in Leather Shoes
When attempting to fix a tear in leather shoes, it’s easy to make mistakes that can compromise the repair or even worsen the damage. One of the most common errors is using the wrong adhesive. Regular household glue, super glue, or craft adhesives often dry stiff and brittle, causing the leather to crack when the shoe flexes. Always use a flexible leather adhesive or contact cement designed specifically for footwear to ensure durability and flexibility.
Another frequent mistake is skipping the preparation stage. Trying to glue or fill a tear on dirty or oily leather prevents the products from bonding effectively. Even small amounts of dust or shoe polish can interfere with adhesion. Proper cleaning with leather cleaner or rubbing alcohol is essential for a long-lasting repair. Similarly, neglecting to protect surrounding areas with masking tape can lead to glue or dye spreading to unwanted sections, leaving visible marks.
Rushing through the repair is another pitfall. Many people apply filler in thick layers or fail to let adhesives dry fully before moving on to the next step. Thick filler often cracks, while insufficient drying time weakens the bond. Patience is crucial—thin layers and proper curing ensure professional-looking results. Over-sanding is another risk; while smoothing the filler is necessary, excessive sanding can thin the leather around the tear and make it more fragile.
Finally, failing to match the color correctly is one of the biggest giveaways of a poor repair. Using dye that’s too light, too dark, or unevenly applied makes the repair obvious. Taking time to mix and test shades before applying ensures the repaired area blends seamlessly with the rest of the shoe. Avoiding these mistakes will not only improve the appearance but also the longevity of your effort to fix a tear in leather shoes.
Alternative Methods for Fixing a Tear in Leather Shoes
While traditional repair methods using adhesive, filler, and dye are effective, there are alternative approaches towards how to fix a tear in leather shoes that may suit specific situations or preferences. These alternatives are helpful if you don’t have access to repair kits or want creative solutions to extend the life of your footwear. Each method has its own advantages, and in some cases, combining techniques yields the best results.
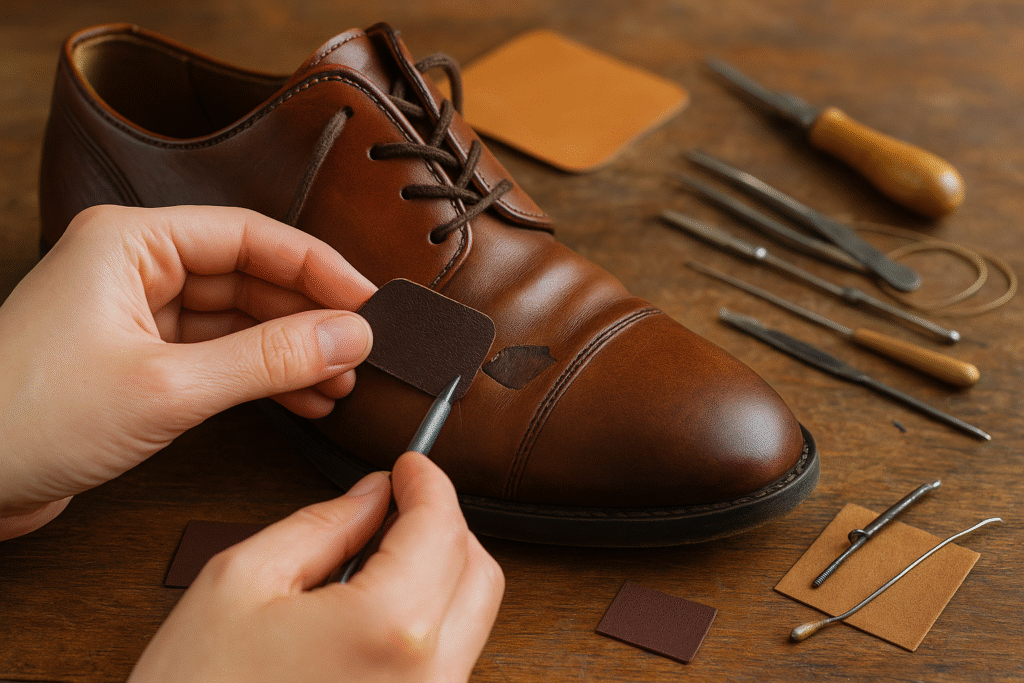
One option is patching. Instead of filling the tear, you can apply a small leather patch over the damaged area. This method works well for larger or irregular tears where adhesives alone may not hold. Patches can be glued on or stitched into place, and with the right color and texture, they can blend in or even add a stylish accent. Decorative stitching is another variation, where the repair becomes part of the shoe’s design, giving it a rustic or custom-crafted look.
For cosmetic fixes, leather paint can be used to camouflage small tears. This is particularly effective for minor surface-level damage where the structural integrity of the shoe is still intact. Applying a thin layer of paint over the area helps conceal imperfections and refresh the overall appearance. While not as strong as filler-based repairs, it’s a quick way to improve aesthetics when durability isn’t the main concern.
Another alternative is using flexible fabric or leather glue combined with mesh backing. A thin piece of mesh or fabric placed underneath the tear adds reinforcement, preventing the damage from spreading. This method is ideal for areas that endure a lot of stress, such as the toe or side seams. Once secured, the leather surface can be recolored or conditioned to match the rest of the shoe.
Finally, professional cobbler services remain a reliable alternative. If the tear is extensive or you’re concerned about aesthetics, an expert can often replace entire leather panels or rebuild sections of the shoe. While more expensive, this option is worth considering for high-end shoes or those with sentimental value. By exploring these alternative methods, you can find the approach that best fits your needs and successfully fix a tear in leather shoes.
Expert Tips and Best Practices
If you want your repair to look professional and last for years, following expert advice is essential when you fix a tear in leather shoes. One of the most important tips is to always work with high-quality materials. Cheap adhesives or fillers may provide a quick fix, but they tend to crack or peel with use. Investing in reputable leather repair kits or products designed specifically for footwear ensures durability and a more natural finish. Experts also emphasize preparation—taking time to clean, sand, and protect surrounding areas before repair dramatically improves the outcome.
Another best practice is applying thin layers. Whether it’s adhesive, filler, or dye, multiple light applications are far more effective than one heavy coat. Thick applications tend to dry unevenly and often crack under stress. Allowing each layer to dry fully before moving on is crucial, even if it requires patience. Professionals also recommend practicing color blending on a small hidden area of the shoe before applying dye to the repaired section, ensuring the shade matches seamlessly.
Conditioning your shoes after repair is another expert recommendation. Leather can dry out easily, and repaired areas are especially vulnerable to cracking. A good leather conditioner restores flexibility, protects against moisture, and helps the repair blend more naturally with the rest of the shoe. For long-term care, polish your shoes regularly and avoid exposing them to extreme heat or moisture, which can undo your hard work.
For those who want additional guidance, resources like the Shoegazing guide on leather care and repair offer detailed insights from footwear professionals. By combining proper preparation, high-quality products, and consistent maintenance, you’ll not only successfully fix a tear in leather shoes but also extend the overall life of your footwear.
Frequently Asked Questions About Fixing a Tear in Leather Shoes
When people attempt to fix a tear in leather shoes, they often have similar questions about cost, durability, and the right techniques. Addressing these common concerns can help you approach the repair with confidence and avoid unnecessary mistakes. Below are the most frequently asked questions and their expert-backed answers.
Can I repair leather shoes at home, or should I go to a cobbler?
Yes, many small tears can be repaired at home with a quality leather repair kit. Adhesive, filler, and dye are usually enough for minor damage. However, if the tear is large or located in a high-stress area like the toe box, a cobbler may be the better option for long-term durability.
How long will a DIY repair last?
With the right products and careful application, a home repair can last for years. The key is regular maintenance—conditioning the leather, polishing, and avoiding moisture. A well-executed repair is often just as durable as professional work, especially for small tears.
Will the repair be visible?
If done carefully, the repair can be almost invisible. Using filler sparingly, sanding between layers, and matching the dye precisely are the most important steps. Poor color blending is usually the biggest giveaway, so test shades before committing. Done right, your attempt to fix a tear in leather shoes should leave only a faint line, if any.
What kind of glue works best for leather?
Always use a flexible leather adhesive or contact cement. Regular glues and super glues are too brittle and will crack under pressure. For product comparisons, consult trusted sources like Consumer Reports’ guide to leather care, which evaluates adhesives and conditioners.
Can large tears really be fixed?
Yes, but they may require patching or professional replacement of leather panels. While DIY kits are great for smaller repairs, cobblers have access to tools and materials that make larger fixes seamless and durable. It’s often worth the investment if the shoes are high-quality or hold sentimental value.
These FAQs show that with the right products, patience, and proper care, you can fix a tear in leather shoes effectively and keep them looking polished for years to come.
 Read Similar Topics
- 10 Best Ways to Fix Ripped Sneaker Like a Pro
- Overcoming Coffee Spill on Shoe: Powerful Fixes for Every Material
- The Ultimate Guide to Fix Burn Hole on Couch
- Effortlessly Remove Superglue from Painted Material
- Unlock Efficiency: How to Unstick Stuck Shelf Easily
Conclusion: Putting It All Together
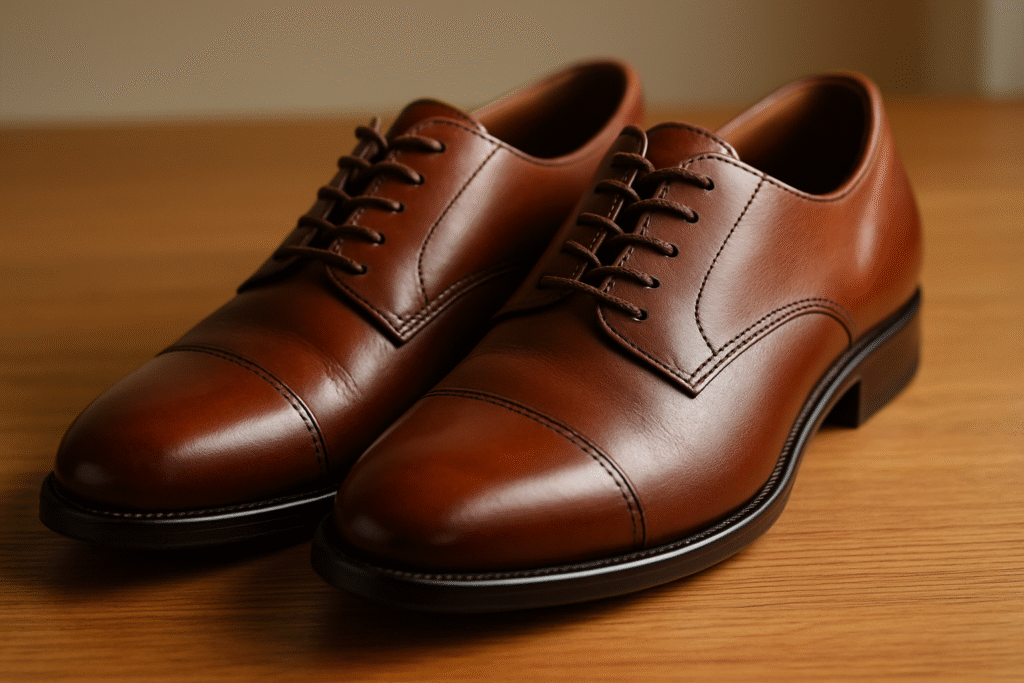
Learning how to fix a tear in leather shoes is more than a quick repair—it’s about preserving your investment and keeping your footwear looking polished for years. From cleaning and preparing the damaged area, to applying adhesive, filling gaps, and blending with dye, each step contributes to a repair that’s both durable and discreet. Along the way, we’ve explored common mistakes to avoid, alternative repair methods, and expert-backed practices to ensure the process is smooth and effective.
The most important lesson is patience. Rushing through repairs often leads to weak bonds, visible marks, or cracks that appear after only a few wears. Taking your time with thin layers of filler, proper curing, and careful color blending ensures the repair looks professional. Equally important is prevention—regularly cleaning, conditioning, and polishing your shoes helps prevent tears in the first place and keeps the leather flexible enough to resist damage.
Whether you choose a DIY approach or seek the help of a cobbler, knowing the fundamentals empowers you to make the right decision for each situation. Smaller tears can often be fixed at home with a steady hand and the right products, while larger or high-stress damage may require professional attention. Either way, the skills and knowledge you’ve gained will save you money, extend the life of your footwear, and reduce unnecessary waste.
By practicing these techniques, you can confidently fix a tear in leather shoes and restore them to their original charm. The satisfaction of seeing your shoes look and feel like new again is worth the effort, and with proper care, your repaired pair will continue to carry you forward in style.


Pingback: Proven Steps To Fix Moen Shower Valve Issues Fast
Pingback: Bathtub Baking Soda Hacks For Amazing Easy Cleaning
Pingback: Marble Scratch Repair With Simple Powerful Methods
Pingback: Fix Cigarette Burn In Headliner Fast With Proven Tricks
Pingback: How To Fix An Uneven Zipper Easily With Smart Hacks
Pingback: How To Fix A Scratched Wii Disc: An Ultimate Guide